
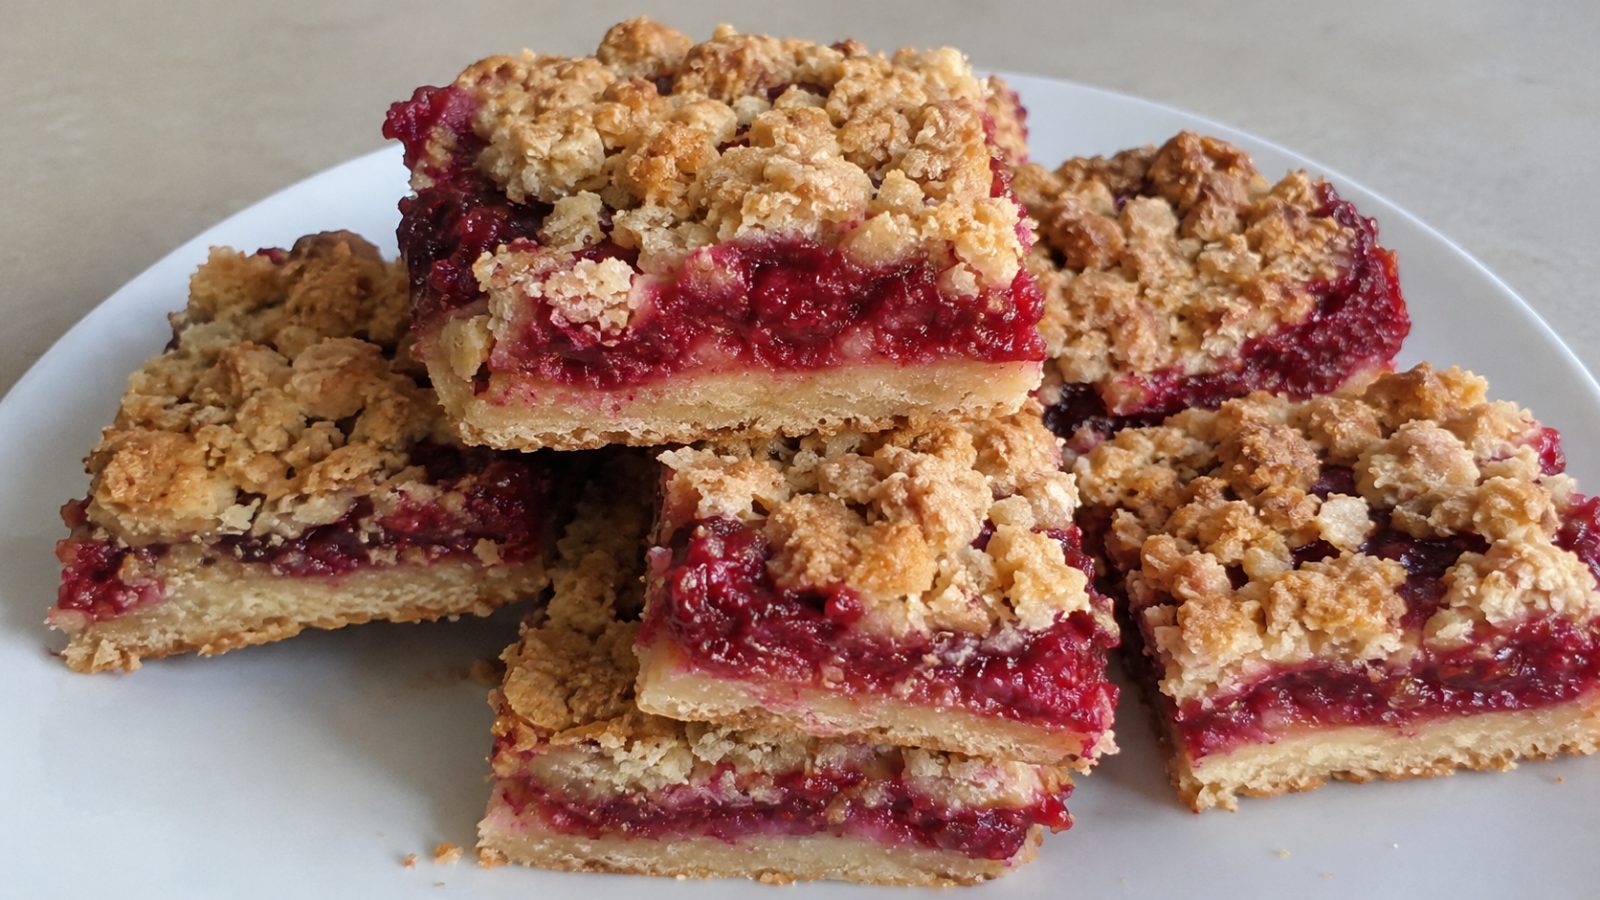
There is something deeply satisfying about a dessert that looks bakery-worthy but comes together with simple pantry staples. Raspberry Crumble Bars are exactly that kind of treat. They feature a soft, buttery shortbread-style base, a jammy layer of bright raspberry filling, and a golden crumbly topping that adds the perfect crunch. Whether you are baking for a family gathering, a school event, or just a quiet afternoon with a cup of tea, this recipe delivers reliable results every time. Best of all, you only need one bowl for the dough and one pan for baking.
Key Takeaways
- The same dough forms both the base and the topping, which saves time and keeps cleanup easy.
- Cold butter is the secret to a tender base and a crumb topping that stays distinct and crisp.
- Cornstarch and a splash of lemon juice keep the raspberry filling thick, bright, and never runny.
- Both fresh and frozen berries work well, and the bars store beautifully for days or even months.
- Letting the pan cool completely before slicing guarantees clean, neat squares.
Why You Will Love This Recipe
Every great dessert earns its place in your recipe box for a reason, and these bars have plenty. First, they are incredibly forgiving. Unlike delicate cakes or finicky pastries, the dough does not need rolling, chilling for hours, or careful shaping. You simply press most of it into the pan, spread the filling, and scatter the rest on top.
Second, the flavor balance is wonderful. Raspberries bring a natural tartness that cuts through the richness of the butter, so each bite feels lively rather than heavy. A touch of lemon zest in the dough lifts the whole thing and makes the fruit taste even fresher.
Third, the texture contrast is hard to beat. You get a tender, slightly chewy base, a soft and juicy center, and a crisp, sandy topping. It is the kind of dessert that disappears quickly from a platter.
Finally, this recipe is wonderfully flexible. You can swap fruits, add spices, change the topping, or scale the batch up or down. Once you master the basic method, you will find yourself making endless variations throughout the year.
Ingredients You Will Need
Gathering your ingredients before you start makes the process smooth and stress-free. Here is what goes into a standard 9×13 inch pan, which yields about 24 generous bars.
For the crust and crumble topping:
- 2 and 1/2 cups (315 g) all-purpose flour
- 3/4 cup (150 g) granulated sugar
- 1/2 teaspoon baking powder
- 1/2 teaspoon fine salt
- 1 cup (226 g) cold unsalted butter, cut into small cubes
- 1 large egg, cold
- 1 teaspoon pure vanilla extract
- Zest of 1 lemon
For the raspberry filling:
- 4 cups (500 g) fresh or frozen raspberries
- 1/2 cup (100 g) granulated sugar
- 2 tablespoons cornstarch
- 1 tablespoon fresh lemon juice
- Pinch of salt
Optional topping boosters:
- 1/2 cup rolled oats or chopped almonds
- A light dusting of powdered sugar for serving
A Few Notes on the Ingredients
Use unsalted butter so you can control the salt level. Keep it very cold, straight from the refrigerator, because warm butter melts into the flour and creates a greasy, dense texture instead of a crumbly one. The egg binds the dough just enough to hold together without making it cakey.
For the filling, cornstarch is essential. Raspberries release a lot of juice as they bake, and without a thickener the bars can turn soggy at the bottom. The lemon juice brightens the flavor and helps the filling set with a pleasant, jammy consistency.
Equipment Checklist
You do not need anything fancy. A 9×13 inch metal or glass baking pan works best. Line it with parchment paper, leaving an overhang on two sides so you can lift the whole slab out after baking. This trick makes slicing so much easier and protects the base from sticking.
You will also need a large mixing bowl, a fork or pastry cutter, a small bowl for the filling, a spatula, and a sharp knife. A food processor can speed up the dough, but your hands work perfectly well.
Step-by-Step Instructions
Step 1: Prepare the Pan and Oven
Preheat your oven to 350 degrees Fahrenheit (175 degrees Celsius). Line the baking pan with parchment paper, allowing the edges to hang over the sides. Lightly grease the paper if you like extra insurance against sticking.
Step 2: Make the Dough
In a large bowl, whisk together the flour, sugar, baking powder, salt, and lemon zest. Rubbing the zest into the sugar with your fingertips first releases its fragrant oils and spreads the flavor evenly.
Add the cold cubed butter. Using a pastry cutter, fork, or your fingertips, work the butter into the dry ingredients until the mixture looks like coarse, damp sand with some pea-sized clumps. Add the egg and vanilla, then mix gently until large crumbs form and the dough holds together when squeezed. Avoid overworking it, since you want tenderness rather than toughness.
Step 3: Form the Base
Set aside about 1 and 1/2 cups of the dough for the topping. Press the remaining dough firmly and evenly into the bottom of the prepared pan. The back of a measuring cup or the flat bottom of a glass helps create a smooth, level surface.
Step 4: Pre-Bake the Crust
Bake the base for 15 to 18 minutes, until it looks set and just barely begins to turn pale gold at the edges. Pre-baking is a small step that makes a big difference, because it gives the bottom layer a head start and keeps it from turning gummy under the fruit.
Step 5: Prepare the Filling
While the crust bakes, combine the raspberries, sugar, cornstarch, lemon juice, and salt in a bowl. Toss gently so the berries stay mostly whole. If you are using frozen fruit, do not thaw it first. Add it straight from the freezer and toss with the cornstarch to prevent excess moisture.
Step 6: Assemble the Bars
Remove the pan from the oven and spread the raspberry mixture evenly over the warm crust. Crumble the reserved dough over the top in small and medium pieces. Leave a few gaps so the fruit peeks through, which gives the finished bars that rustic, inviting look. If you are adding oats or nuts, mix them into the topping now.
Step 7: Bake Until Golden
Return the pan to the oven and bake for 30 to 35 minutes. The topping should be deep golden brown, and the filling should be bubbling around the edges. Bubbling is your sign that the cornstarch has activated and the filling will set properly.
Step 8: Cool Completely
This step requires patience, but it matters. Let the bars cool in the pan at room temperature for at least 2 hours. For the cleanest slices, chill them in the refrigerator for another 30 minutes. Lift the slab out using the parchment overhang, then cut into squares with a sharp knife, wiping the blade between cuts.
Tips for the Perfect Crumble Texture
The crumb topping can make or break a bar, so a few small habits are worth adopting.
Keep the butter cold. If your kitchen is warm, pop the cubed butter in the freezer for ten minutes before mixing. Cold butter creates little pockets that turn crisp and flaky as they bake.
Squeeze, then break. When making the topping, squeeze handfuls of dough together and then break them apart into irregular pieces. Varied sizes produce a more interesting texture, with some tender clumps and some crunchy bits.
Do not press the topping down. Scatter it loosely. Pressing it compacts the crumbs and makes the surface dense rather than crisp.
Rotate the pan. Ovens often have hot spots. Turning the pan halfway through baking encourages even browning across the whole surface.
Fresh vs. Frozen Raspberries
Many bakers wonder whether fresh fruit is better than frozen, and the honest answer is that both perform beautifully. Fresh berries give you a slightly more delicate texture and a brighter look, which is ideal in summer when they are at their peak and affordable.
Frozen berries, on the other hand, are available year-round, often cost less, and are picked and frozen at peak ripeness. They release more liquid during baking, so make sure the cornstarch is thoroughly tossed through them. Never thaw and drain them beforehand, because thawing makes them mushy and breaks down their structure.
If your berries are especially tart, increase the sugar by a tablespoon or two. If they are very sweet, you can reduce it slightly and add an extra squeeze of lemon.
Common Mistakes to Avoid
Even simple recipes have a few pitfalls. Watch out for these frequent issues.
Skipping the pre-bake. Without it, the base can turn soft and underbaked beneath the juicy filling.
Overmixing the dough. Working it too long warms the butter and develops gluten, leading to a tough texture. Mix just until it comes together.
Using too little thickener. A runny filling will soak into the crust and make slicing messy. Measure the cornstarch carefully.
Cutting too early. Warm bars are fragile and the filling has not set. Waiting is the single best way to get clean squares.
Overbaking. Pull the pan when the top is golden and the edges bubble. Baking too long dries out the crust and caramelizes the fruit too much.
Flavor Variations to Try
Once you have the basic method down, it is easy to customize the recipe to suit your mood or the season.
Almond and raspberry. Replace the vanilla with 1/2 teaspoon of almond extract and sprinkle sliced almonds over the topping before baking.
Oatmeal crumble. Stir in a cup of old-fashioned oats and a pinch of cinnamon for a heartier, cookie-like topping.
Lemon cream cheese layer. Spread a thin layer of sweetened cream cheese over the crust before adding the berries for a tangy, cheesecake-inspired twist.
White chocolate drizzle. After cooling, drizzle melted white chocolate over the top for a pretty finish and added sweetness.
Mixed berry. Swap half the raspberries for blueberries, blackberries, or chopped strawberries. The method stays exactly the same.
Brown sugar crumble. Replace half the granulated sugar in the topping with packed light brown sugar for a deeper, caramel-like flavor.
Spiced version. A half teaspoon of ground cardamom or ginger in the dough adds a warm, aromatic note that pairs surprisingly well with tart berries.
How to Store, Freeze, and Reheat
Room temperature. Store the cut bars in an airtight container for up to 2 days. Place parchment between layers so the crumbs stay intact.
Refrigerator. For longer freshness, keep them chilled for up to 5 days. The filling stays firm and the flavor actually deepens slightly. Let them sit out for 15 minutes before serving if you prefer a softer bite.
Freezer. Wrap individual bars tightly in plastic wrap, then place them in a freezer-safe bag. They keep well for up to 3 months. Thaw overnight in the refrigerator.
Reheating. To bring back that fresh-baked warmth and crispness, heat a bar in a 300 degree Fahrenheit oven for 8 to 10 minutes. A microwave works in a pinch, but it softens the topping.
Serving Ideas
These bars are lovely on their own, but a few simple pairings turn them into a full dessert experience. Serve a warm square with a scoop of vanilla ice cream, and let it melt into the jammy filling. A dollop of lightly sweetened whipped cream or a spoonful of Greek yogurt adds a cool, creamy contrast.
For brunch, cut the bars into smaller pieces and arrange them alongside fresh fruit, pastries, and coffee. For parties, dust them with powdered sugar and stack them on a tiered stand. They also pack well for picnics, lunchboxes, and bake sales because they are sturdy and hold their shape.
Make-Ahead and Gifting Tips
Busy schedules are no problem with this recipe. You can prepare the dough up to 2 days in advance and keep it covered in the refrigerator. Let it sit at room temperature for a few minutes before pressing it into the pan. You can also bake the whole pan a day ahead, since the flavors meld and the texture sets even better overnight.
Frequently Asked Questions
Can I make these bars gluten-free?
Yes. Substitute a cup-for-cup gluten-free flour blend for the all-purpose flour. The dough may be a little more fragile, so press it gently and let the bars cool fully before cutting.
Why is my filling runny?
This usually happens when the cornstarch was skipped or measured too lightly, or the bars were cut while still warm. Make sure you see bubbling at the edges during baking, and let the pan cool completely.
Can I use jam instead of fresh berries?
Absolutely. Use about 1 and 1/2 cups of good-quality raspberry jam, spread over the pre-baked crust. It is a quick shortcut, though the flavor will be sweeter and less tart than with whole fruit.
Can I halve the recipe for a smaller pan?
Yes. Cut all ingredients in half and bake in an 8×8 inch pan. The baking time stays close to the same, so start checking a few minutes early.
How do I get cleaner slices?
Chill the baked slab for 30 minutes after it cools, lift it out with the parchment, and use a long, sharp knife. Wipe the blade clean between each cut.
Can I use a different fruit?
Definitely. Blueberries, blackberries, cherries, peaches, and apples all work well. Adjust the sugar and cornstarch slightly depending on how juicy the fruit is.
A pan of homemade Raspberry Crumble Bars proves that simple ingredients and a few smart techniques can create something truly special. With a buttery base, a bright and jammy center, and a crisp golden topping, they suit every season and every occasion. Keep your butter cold, thicken the filling well, and give the pan time to cool, and you will be rewarded with neat, bakery-style squares. Bake a batch, share it with someone you love, and enjoy every last crumb.