
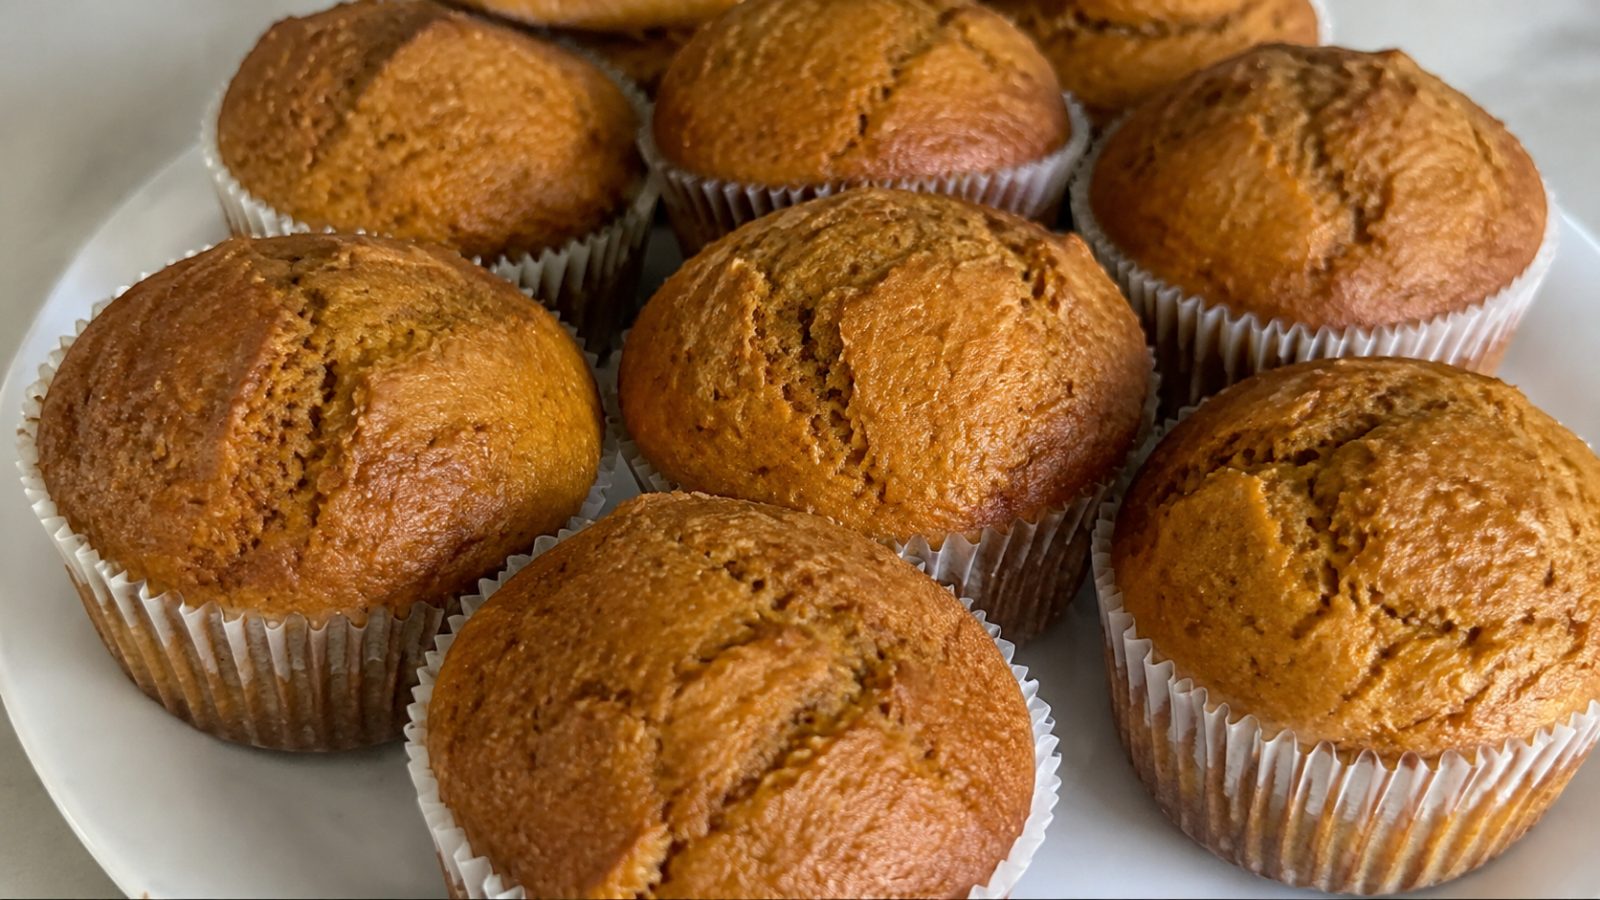
When the air turns crisp and the leaves start to fall, nothing fills a kitchen with warmth like a tray of freshly baked muffins. If you want a dependable pumpkin muffins recipe that delivers a soft, moist crumb, a perfectly domed top, and a generous hit of autumn spice, you are in the right place. These muffins come together in one bowl, need no mixer, and bake in about 20 minutes. They taste like a bakery treat but cost a fraction of the price. Whether you are packing school lunches, hosting brunch, or simply craving something sweet with your coffee, this guide walks you through every detail so your batch turns out beautifully the first time.
Key Takeaways
- These muffins use a simple one-bowl method and need only basic pantry staples plus canned pumpkin puree.
- A short blast of high heat at the start of baking creates tall, bakery-style domed tops.
- Do not overmix the batter. Stir only until the flour disappears for a tender, fluffy texture.
- The muffins keep for four days at room temperature and freeze well for up to three months.
- Easy swaps and add-ins let you adapt the batch for dairy-free diets, extra crunch, or chocolate lovers.
Why Homemade Pumpkin Muffins Beat Store-Bought
Coffee shop pumpkin muffins can look tempting behind the glass, but they are often dry, overly sweet, or heavy with preservatives. Baking at home gives you complete control over the flavor, the sweetness, and the quality of every ingredient. You decide how much spice goes in, whether to add nuts or chocolate chips, and how big each muffin should be.
Homemade muffins are also remarkably economical. A single can of pumpkin puree yields more than enough for a full dozen, and the rest of the ingredients are likely already in your pantry. Beyond the savings, there is the simple pleasure of pulling a golden, fragrant tray from the oven. The scent of cinnamon, ginger, and nutmeg drifting through the house is a seasonal ritual that no store purchase can match.
Pumpkin itself also brings some real benefits to baking. The puree adds natural moisture, which means the muffins stay soft for days. It also contributes fiber and vitamin A, so you can feel a little better about reaching for a second one.
Ingredients You Will Need
This batch makes 12 standard muffins. Gather everything before you begin so the process feels smooth and relaxed.
For the muffins:
- 1 3/4 cups (220 g) all-purpose flour
- 1 teaspoon baking powder
- 1/2 teaspoon baking soda
- 1/2 teaspoon fine salt
- 2 teaspoons ground cinnamon
- 1/2 teaspoon ground ginger
- 1/4 teaspoon ground nutmeg
- 1/8 teaspoon ground cloves
- 1 cup (245 g) pure pumpkin puree
- 2 large eggs, at room temperature
- 1/2 cup (100 g) packed light brown sugar
- 1/4 cup (50 g) granulated sugar
- 1/2 cup (120 ml) neutral oil or melted butter
- 1/4 cup (60 ml) milk or buttermilk
- 2 teaspoons pure vanilla extract
For the sparkly topping:
- 2 tablespoons coarse or granulated sugar
- 1/2 teaspoon ground cinnamon
- 2 tablespoons pumpkin seeds (optional)
Ingredient Notes and Smart Substitutions
Understanding what each ingredient does helps you bake with confidence and adapt when your pantry is missing something.
Pumpkin puree. Always buy pure pumpkin puree, not pumpkin pie filling. Pie filling already contains sugar and spices, which will throw off the balance of the batter. If you roast your own pumpkin, blot the puree with paper towels first because homemade versions tend to hold more water than canned.
Flour. Standard all-purpose flour works perfectly. Measure it by spooning it into the cup and leveling it off, or better yet, use a kitchen scale. Packing flour into the cup can add up to 30 percent more than intended, which leads to dense, dry muffins.
Sugars. Brown sugar adds a subtle molasses depth and keeps the crumb moist, while white sugar helps the tops brown nicely. You can use all brown sugar if you prefer a richer flavor.
Fat. Oil produces the softest, most tender muffins that stay moist for days. Melted butter gives a richer, more buttery flavor but a slightly firmer crumb. Both work well, so choose based on your taste.
Milk. Buttermilk adds a gentle tang and extra tenderness thanks to its acidity, which reacts with the baking soda. Regular milk is fine, and any plant-based milk works for a dairy-free version.
Spices. Fresh spices make a noticeable difference. If your cinnamon has been sitting in the cabinet for years, replace it. As a shortcut, you can swap the four individual spices for 2 1/2 teaspoons of pumpkin pie spice.
Eggs. Room temperature eggs blend more evenly into the batter. If you forgot to take them out, place them in a bowl of warm water for five minutes.
How to Make Pumpkin Muffins Step by Step
Follow these steps closely and you will be rewarded with tall, tender, perfectly spiced muffins.
Step 1: Prepare the oven and pan. Position a rack in the center of the oven and preheat to 425°F (220°C). Line a 12-cup muffin tin with paper liners, or grease each cup thoroughly. Greasing the top of the pan around the cups also helps if your muffins spill over a little.
Step 2: Whisk the dry ingredients. In a medium bowl, whisk together the flour, baking powder, baking soda, salt, cinnamon, ginger, nutmeg, and cloves. Whisking distributes the leavening and spices evenly, so every bite tastes the same. Set the bowl aside.
Step 3: Mix the wet ingredients. In a large bowl, whisk the pumpkin puree, eggs, brown sugar, and granulated sugar until smooth and slightly glossy. Add the oil, milk, and vanilla, then whisk again until fully combined. The mixture should look uniform with no streaks of oil.
Step 4: Combine gently. Pour the dry ingredients into the wet ingredients. Use a rubber spatula to fold everything together with as few strokes as possible. Stop as soon as you no longer see dry flour. A few small lumps are perfectly fine and even desirable. Overmixing develops gluten, which makes muffins tough and rubbery.
Step 5: Rest the batter. Let the batter sit for 10 minutes while the oven finishes heating. This short rest allows the flour to hydrate fully and is one of the secrets to a high, rounded dome.
Step 6: Fill the cups. Use a large cookie scoop or a 1/3 cup measure to portion the batter. Fill each cup nearly to the top, about 3/4 to full. Muffin tops need that extra batter to rise above the rim.
Step 7: Add the topping. Stir the coarse sugar and cinnamon together, then sprinkle the mixture over each muffin. Add a few pumpkin seeds if you like some crunch.
Step 8: Bake in two stages. Place the tin in the oven and bake at 425°F for 5 minutes. Without opening the door, reduce the temperature to 350°F (175°C) and continue baking for 15 to 17 minutes. The muffins are done when a toothpick inserted in the center comes out clean or with a few moist crumbs.
Step 9: Cool properly. Let the muffins rest in the pan for 5 minutes, then transfer them to a wire rack. Cooling in the pan for too long traps steam and makes the bottoms soggy.
Tips for Bakery-Style Domed Tops
That tall, rounded crown is what separates an average muffin from a showstopper. Several small techniques make it happen.
The most important is the high-to-low temperature method used above. The initial 425°F burst causes the batter to rise rapidly before the crust sets, pushing the center upward. Lowering the heat afterward lets the inside cook through without burning the exterior.
Thick batter also helps. If your batter looks thin and pourable, the muffins will spread rather than rise. Pumpkin puree should be thick, not watery. Resting the batter, as described earlier, thickens it slightly and improves the lift.
Finally, fill the cups generously. Many home bakers fill them only halfway and end up with flat, shy muffins. Filling nearly to the top gives the batter the volume it needs to crown over the edge.
Common Mistakes to Avoid
Even a simple batch can go wrong if a few easy errors sneak in. Here are the most frequent ones and how to dodge them.
Overmixing the batter. This is the number one cause of dense muffins. Fold gently and stop early.
Using pumpkin pie filling. The extra sugar and spices change both the taste and the texture. Check the label before you buy.
Measuring flour incorrectly. Scooping straight from the bag compacts the flour. Spoon and level, or weigh it.
Skipping the oven preheat. A cold oven prevents that initial burst of rise. Always allow the oven to reach full temperature first.
Opening the oven door too early. A sudden drop in temperature can cause the domes to collapse. Wait until the final few minutes before checking.
Overbaking. Muffins continue to cook slightly from residual heat. Pull them out as soon as the toothpick test is clean.
Delicious Variations to Try
Once you master the base batch, endless flavor combinations await.
Chocolate chip pumpkin muffins. Fold in 3/4 cup of semi-sweet chocolate chips. The bittersweet chocolate pairs wonderfully with warm spices.
Streusel-topped muffins. Combine 1/3 cup flour, 1/4 cup brown sugar, 1/2 teaspoon cinnamon, and 3 tablespoons cold butter. Rub together until crumbly and sprinkle over the batter before baking.
Cream cheese filled muffins. Beat 4 ounces of softened cream cheese with 2 tablespoons of sugar. Drop a spoonful into the center of each cup of batter, then top with a little more batter.
Nutty crunch. Stir in 1/2 cup of chopped walnuts or pecans for texture and a toasty flavor.
Healthier swap. Replace half of the flour with white whole wheat flour and reduce the sugar by two tablespoons. Unsweetened applesauce can replace up to half of the oil.
Vegan and dairy-free. Use a flax egg for each egg (1 tablespoon ground flaxseed mixed with 3 tablespoons water), plant-based milk, and oil instead of butter.
Maple glaze. Whisk 1 cup powdered sugar with 2 tablespoons maple syrup and a splash of milk. Drizzle over cooled muffins for a sweet finish.
How to Store, Freeze, and Reheat
Proper storage keeps your muffins tasting freshly baked for days.
Room temperature. Once completely cool, place the muffins in an airtight container lined with a paper towel. The towel absorbs excess moisture and prevents sticky tops. They stay fresh for up to four days.
Refrigerator. Because pumpkin muffins contain eggs and moist puree, refrigeration extends their life to about a week. Bring them back to room temperature or warm them briefly before serving.
Freezer. Wrap each cooled muffin individually in plastic wrap, then place them in a freezer bag. They keep well for up to three months. Thaw overnight on the counter or microwave a frozen muffin for 30 to 40 seconds.
Reheating. For that just-baked taste, warm a muffin in a 300°F oven for 8 to 10 minutes, or microwave it for 15 seconds. Split it open and add a pat of butter for an extra treat.
Serving Ideas and Nutrition Notes
These muffins are versatile enough for any time of day. Serve them warm at breakfast with a cup of coffee, chai, or hot apple cider. Pack one in a lunchbox for an easy snack, or add them to a brunch spread alongside fruit and yogurt. For dessert, split a muffin, toast it lightly, and top it with a scoop of vanilla ice cream.
Each muffin made with oil contains roughly 230 to 260 calories, depending on toppings and add-ins. Pumpkin supplies fiber and beta carotene, which the body converts to vitamin A. For a protein boost, spread a little almond butter or Greek yogurt on top.
Frequently Asked Questions
Can I use fresh pumpkin instead of canned puree?
Yes, but roast and puree it first, then drain or blot away extra moisture. Fresh puree is usually wetter than canned. Sugar pie pumpkins work best because they are sweeter and less stringy than carving varieties.
Why did my muffins turn out dense or gummy?
The most common causes are overmixing the batter or measuring too much flour. Fold only until the flour disappears, and use a scale or the spoon and level method for accuracy.
Can I make the batter ahead of time?
You can refrigerate the batter for up to 24 hours, though the domes may be slightly smaller because the leavening loses some strength. For best results, bake right after the 10 minute rest.
How do I prevent muffins from sticking to the liners?
Lightly spray the paper liners with cooking spray before filling, or choose parchment or silicone liners. Letting the muffins cool for a few minutes before peeling also helps.
Can I turn this batter into a loaf or mini muffins?
Absolutely. Bake a loaf at 350°F for 50 to 60 minutes in a greased 9 by 5 inch pan. Mini muffins need about 10 to 12 minutes at 350°F.
Baking a batch of tender, spiced muffins is one of the simplest ways to bring the comfort of autumn into your home. With pantry staples, a few smart techniques, and a little patience, you can turn out a dozen golden beauties that rival any bakery. Keep this pumpkin muffins recipe handy all season long, experiment with your favorite add-ins, and share a warm muffin with someone who could use a little cozy joy.