
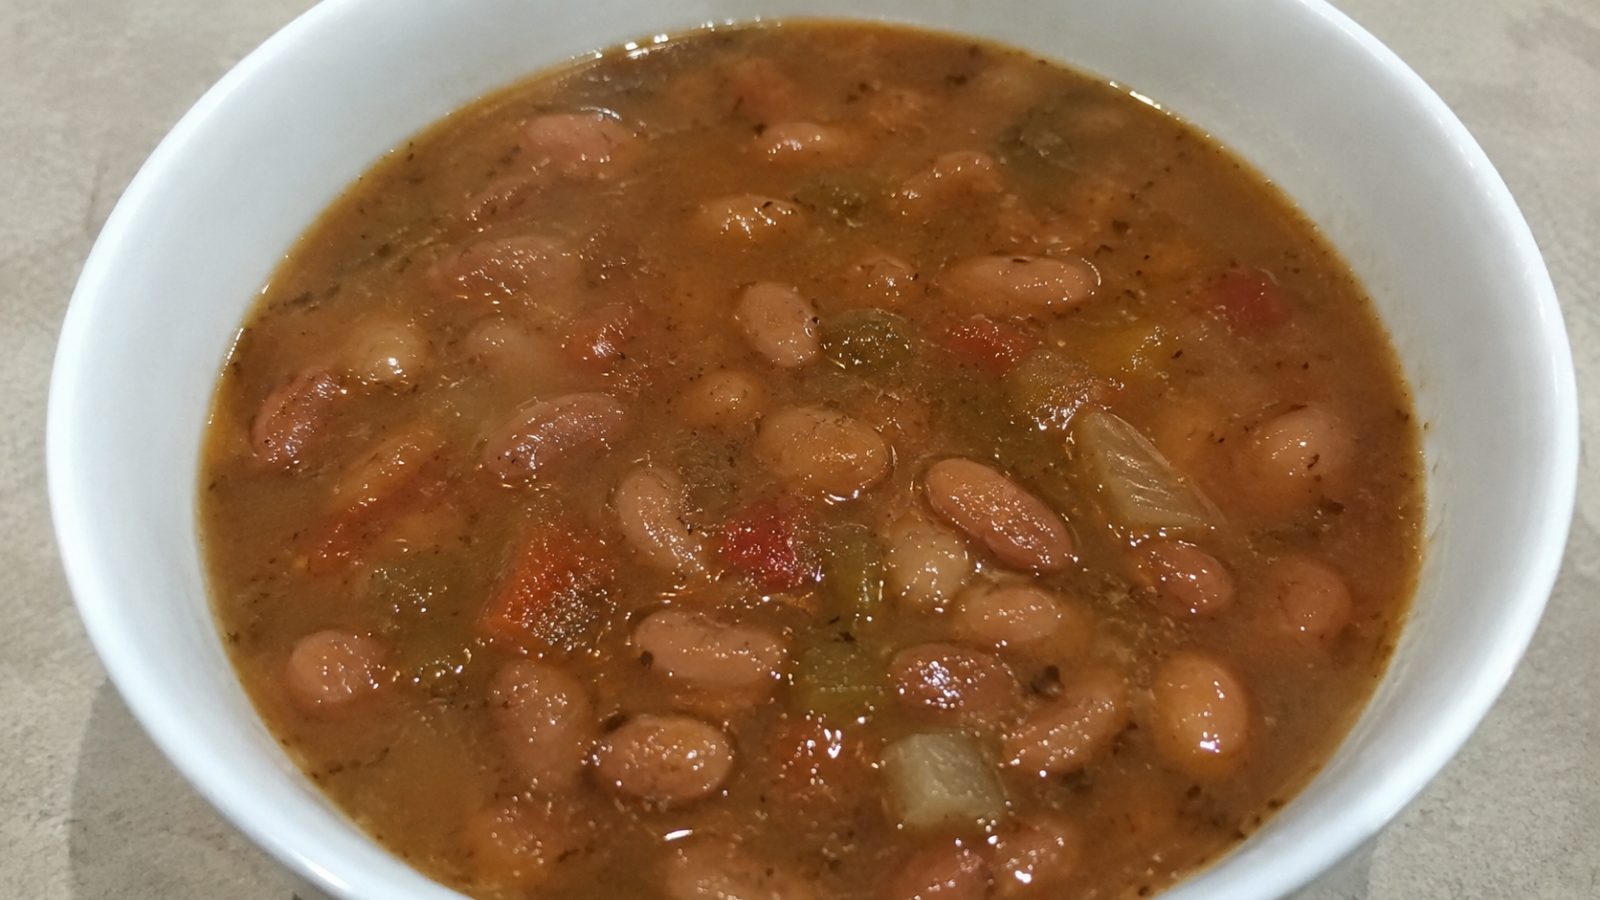
Few dishes match the comfort of a warm bowl of creamy, smoky beans simmered slowly until every spoonful tastes rich and satisfying. This Pinto Bean Soup is the kind of recipe you can make on a quiet weeknight or double for a crowd, and it costs very little to prepare. It relies on pantry staples, builds deep flavor with simple techniques, and keeps well for days. Whether you are a beginner or an experienced home cook, this guide walks you through everything you need to know.
Key Takeaways
- Dried pinto beans give the best texture and flavor, and a good soak makes them cook more evenly.
- Smoked paprika, cumin, garlic, and a splash of acid create layers of flavor without expensive ingredients.
- The soup works on the stovetop, in a slow cooker, or in a pressure cooker, so you can choose the method that suits your schedule.
- Leftovers freeze well for up to three months, making this an excellent meal prep option.
- The recipe is easy to adapt for vegetarian, vegan, or meat-lover diets with a few simple swaps.
Why Pinto Beans Deserve a Place in Your Kitchen
Pinto beans are one of the most popular legumes in North America, and for good reason. They are inexpensive, widely available, and incredibly versatile. Their name comes from the Spanish word for “painted,” which refers to the speckled tan and brown coat of the raw bean. During cooking, those speckles fade into a uniform pinkish brown, and the inside turns soft, creamy, and slightly earthy.
Nutritionally, pinto beans offer a lot for such a humble ingredient. A single cooked cup provides roughly 15 grams of protein and around 15 grams of dietary fiber, which supports digestion and helps you feel full longer. They also contain folate, iron, magnesium, potassium, and manganese. Because they are naturally low in fat and contain complex carbohydrates, they provide steady energy rather than a quick spike and crash.
Beyond nutrition, pinto beans are beloved for how they behave in a pot. As they simmer, some of the beans break down and release starch into the cooking liquid. This creates a naturally thick, velvety broth without the need for cream or flour. That quality makes them ideal for soups, stews, chili, refried beans, and burritos.
Ingredients You Will Need
This recipe serves six to eight people and uses ingredients that most kitchens already have.
For the soup base:
- 1 pound dried pinto beans, rinsed and picked over
- 2 tablespoons olive oil or avocado oil
- 1 large yellow onion, diced
- 2 carrots, peeled and diced
- 2 celery stalks, diced
- 5 cloves garlic, minced
- 1 jalapeño, seeded and finely chopped (optional)
For the seasoning and liquid:
- 2 teaspoons ground cumin
- 1 teaspoon smoked paprika
- 1 teaspoon dried oregano
- 1/2 teaspoon black pepper
- 1 bay leaf
- 8 cups low-sodium vegetable or chicken broth
- 1 can (14 ounces) diced tomatoes with their juices
- 2 teaspoons kosher salt, added toward the end
- 1 to 2 tablespoons apple cider vinegar or fresh lime juice
For finishing:
- Chopped fresh cilantro or parsley
- Sliced green onions
- A drizzle of olive oil
- Crushed tortilla chips, shredded cheese, or sour cream (optional)
Choosing and Preparing the Beans
The first decision is whether to use dried or canned beans. Canned beans are convenient and can work in a pinch, but dried beans reward you with a creamier texture, a more developed flavor, and a much lower cost per serving. They also let you control the sodium level, which is helpful if you are watching your salt intake.
Sorting and Rinsing
Spread the dried beans on a baking sheet and look for small stones, shriveled beans, or bits of debris. This takes less than two minutes and prevents an unpleasant surprise in your bowl. Then rinse the beans thoroughly under cold running water.
To Soak or Not to Soak
Soaking is optional, but it offers real benefits. It shortens cooking time, helps the beans cook evenly, and may reduce the compounds that cause digestive discomfort for some people. There are two reliable methods.
Overnight soak: Place the beans in a large bowl and cover them with at least three inches of cold water. Let them sit for 8 to 12 hours, then drain and rinse.
Quick soak: Put the beans in a large pot, cover with water by three inches, and bring to a boil. Boil for two minutes, turn off the heat, cover, and let stand for one hour. Drain and rinse before cooking.
If you skip soaking altogether, you can still make a delicious soup. Just plan on an extra 45 to 60 minutes of simmering time and keep a little extra broth nearby in case the liquid reduces too much.
Step-by-Step Cooking Instructions
Follow these steps for a reliable stovetop version.
Step 1: Build the flavor base. Heat the oil in a large Dutch oven or heavy soup pot over medium heat. Add the onion, carrots, and celery with a pinch of salt. Cook for 6 to 8 minutes, stirring often, until the vegetables soften and the onion turns translucent. If you are using bacon or sausage, cook it first and use a little of the rendered fat in place of some of the oil.
Step 2: Add the aromatics and spices. Stir in the garlic and jalapeño and cook for about 60 seconds, just until fragrant. Add the cumin, smoked paprika, oregano, and black pepper. Toast the spices in the oil for 30 seconds, stirring constantly. This brief step wakes up their flavor and prevents the soup from tasting flat.
Step 3: Add the beans and liquid. Pour in the drained beans, the broth, the diced tomatoes, and the bay leaf. If you are using a ham hock, nestle it into the pot now. Stir everything together and bring the mixture to a gentle boil.
Step 4: Simmer low and slow. Reduce the heat to low, partially cover the pot, and let the soup simmer. Soaked beans usually need 60 to 90 minutes, while unsoaked beans may need 2 to 2.5 hours. Stir every 20 minutes or so, and add a splash of water or broth if the level drops below the beans.
Step 5: Season at the right time. Wait until the beans are nearly tender before adding salt. Adding salt too early is a common concern, although modern testing suggests it has less effect than once believed. Even so, seasoning near the end gives you better control over the final flavor, especially if your broth is already salty.
Step 6: Create a creamy texture. Once the beans are fully tender, remove the bay leaf and ham hock. Use a potato masher to crush about one quarter of the beans right in the pot. Alternatively, scoop out two cups of soup, blend until smooth, and stir it back in. This thickens the broth naturally and gives it a luxurious body.
Step 7: Brighten and finish. Stir in the vinegar or lime juice. This small addition lifts the whole pot and balances the earthiness of the beans. Taste and adjust the salt, pepper, and acid. If you used a ham hock, shred the meat, discard the bone and fat, and return the meat to the soup.
Flavor Boosters and Variations
Once you master the base recipe, you can customize it in many directions. Here are some ideas that work especially well.
Smoky and spicy: Add one or two chipotle peppers in adobo sauce, chopped finely, along with a teaspoon of the sauce. This gives the soup a deep, smoldering heat that pairs beautifully with the beans.
Tex-Mex style: Stir in a cup of frozen corn and a teaspoon of chili powder during the last 15 minutes. Serve with avocado, lime wedges, and crushed tortilla chips.
Southern comfort: Use a smoked ham hock, add a splash of hot sauce, and serve alongside warm cornbread. A little brown sugar can add a subtle sweetness that echoes traditional Southern cooking.
Leafy greens: Fold in a few handfuls of chopped kale, spinach, or collard greens during the final 10 minutes. The greens add color, nutrients, and a pleasant bitterness.
Vegan and vegetarian: Use vegetable broth, skip the meat, and add a teaspoon of soy sauce or a spoonful of tomato paste for umami depth. A strip of kombu seaweed simmered with the beans can also add savory richness and may help the beans cook more tender.
Creamy finish: For a richer bowl, stir in a splash of coconut milk or a spoonful of sour cream just before serving. Avoid boiling the soup after adding dairy to prevent curdling.
Slow Cooker and Instant Pot Methods
Not everyone has time to watch a pot on the stove, and these beans adapt easily to hands-off cooking.
Slow Cooker Method
Sauté the onion, carrots, celery, garlic, and spices in a skillet as described above, then transfer them to the slow cooker. Add the soaked beans, broth, tomatoes, and bay leaf. Cook on low for 8 to 10 hours or on high for 4 to 6 hours. Finish by mashing some of the beans, adding vinegar, and adjusting the seasoning. Because slow cookers trap moisture, you may need slightly less broth than the stovetop version.
Instant Pot or Pressure Cooker Method
Use the sauté function to cook the vegetables and spices directly in the pot. Add the beans and liquids, then seal the lid. For soaked beans, cook on high pressure for 10 to 12 minutes with a natural release of 15 minutes. For unsoaked beans, cook for 35 to 40 minutes with a natural release. Always avoid filling the pressure cooker more than halfway when cooking beans, since they expand and can foam. A teaspoon of oil in the pot helps reduce foaming.
Common Mistakes to Avoid
Even a simple recipe can go sideways if a few details are overlooked. Keep these tips in mind.
Using old beans. Dried beans that have sat in the pantry for several years may never soften fully, no matter how long you cook them. Try to buy beans from a store with good turnover, and use them within a year of purchase.
Adding acid too early. Tomatoes, vinegar, and citrus can slow the softening of bean skins. If your beans seem stubborn, hold back the vinegar or lime juice until the beans are tender. In the recipe above, the canned tomatoes are the only acidic ingredient added early, and the beans still soften well, but you should add extra simmering time if needed.
Boiling too aggressively. A hard, rolling boil can cause the beans to burst and turn mushy on the outside while staying firm in the center. Keep the heat low and steady for the best results.
Skipping the finishing touches. Many people stop cooking when the beans are tender and wonder why the soup tastes bland. The final seasoning, the splash of acid, and the fresh herbs make a dramatic difference. Always taste and adjust before serving.
Under-seasoning. Beans absorb a lot of salt. If your soup tastes flat even after adding spices, it likely needs more salt rather than more spice. Add it a pinch at a time and taste between additions.
Serving Ideas
A bowl of this soup is satisfying on its own, but a few thoughtful sides and toppings turn it into a complete meal.
- Cornbread or crusty bread: Perfect for dunking and soaking up the broth.
- Rice on the side: Spoon the soup over a scoop of steamed white or brown rice for a heartier dish.
- Fresh toppings: Diced avocado, chopped cilantro, thinly sliced radishes, and a squeeze of lime add freshness and crunch.
- Cheesy additions: Shredded cheddar, crumbled queso fresco, or a dollop of sour cream bring creaminess.
- Crisp salad: A simple cabbage slaw or a green salad with citrus dressing balances the richness of the soup.
- Quesadillas: Cut them into wedges and serve alongside for a fun, family-friendly dinner.
Storing, Freezing, and Reheating
This soup tastes even better the next day, since the flavors continue to meld as it rests. Let it cool for no more than two hours at room temperature, then transfer it to airtight containers. It will keep in the refrigerator for four to five days.
To freeze, portion the cooled soup into freezer-safe containers or zip-top bags, leaving about an inch of headspace for expansion. Lay the bags flat to save space and speed up thawing. The soup keeps well in the freezer for up to three months.
When reheating, thaw the soup overnight in the refrigerator, then warm it gently on the stove over medium-low heat. The soup thickens as it sits, so add a splash of water or broth to loosen it. Refresh the flavor with a squeeze of lime and a sprinkle of fresh herbs before serving.
Frequently Asked Questions
Do I have to soak pinto beans before making soup?
No, soaking is optional. It shortens the cooking time and helps the beans cook evenly, but unsoaked beans will still soften with a longer simmer. Just allow an extra hour or so and keep additional broth on hand.
Can I use canned beans instead of dried?
Yes. Use about three 15-ounce cans, drained and rinsed, and reduce the simmering time to 25 to 30 minutes. The texture will be slightly less creamy, but the soup will still be flavorful.
Why are my beans still hard after hours of cooking?
Old beans, very hard water, or adding acidic ingredients too early are the usual culprits. Try simmering longer, adding a pinch of baking soda to the pot, and holding back vinegar until the end.
How can I make the soup thicker?
Mash a portion of the cooked beans against the side of the pot, or blend a cup or two of the soup and stir it back in. You can also simmer the soup uncovered for 10 to 15 minutes to reduce the liquid.
Is this soup healthy for weight management?
It can be a great fit. The high fiber and plant protein promote fullness, and the soup is naturally low in fat. Keep an eye on added meats, cheese, and salty broths if you are watching calories or sodium.
Can I make this soup ahead for a party?
Absolutely. Prepare it a day or two in advance and reheat gently before serving. Set up a toppings bar with cheese, herbs, avocado, and chips so guests can customize their own bowls.
Few recipes offer as much comfort, nutrition, and value as a well-made pot of beans simmered with simple seasonings. With a little patience and attention to technique, you can turn a bag of dried legumes into a creamy, flavorful meal that feeds a crowd and stretches your grocery budget. Keep this Pinto Bean Soup recipe in your regular rotation, experiment with the variations, and enjoy the satisfaction of a homemade bowl that tastes like it simmered all day, because it did.