
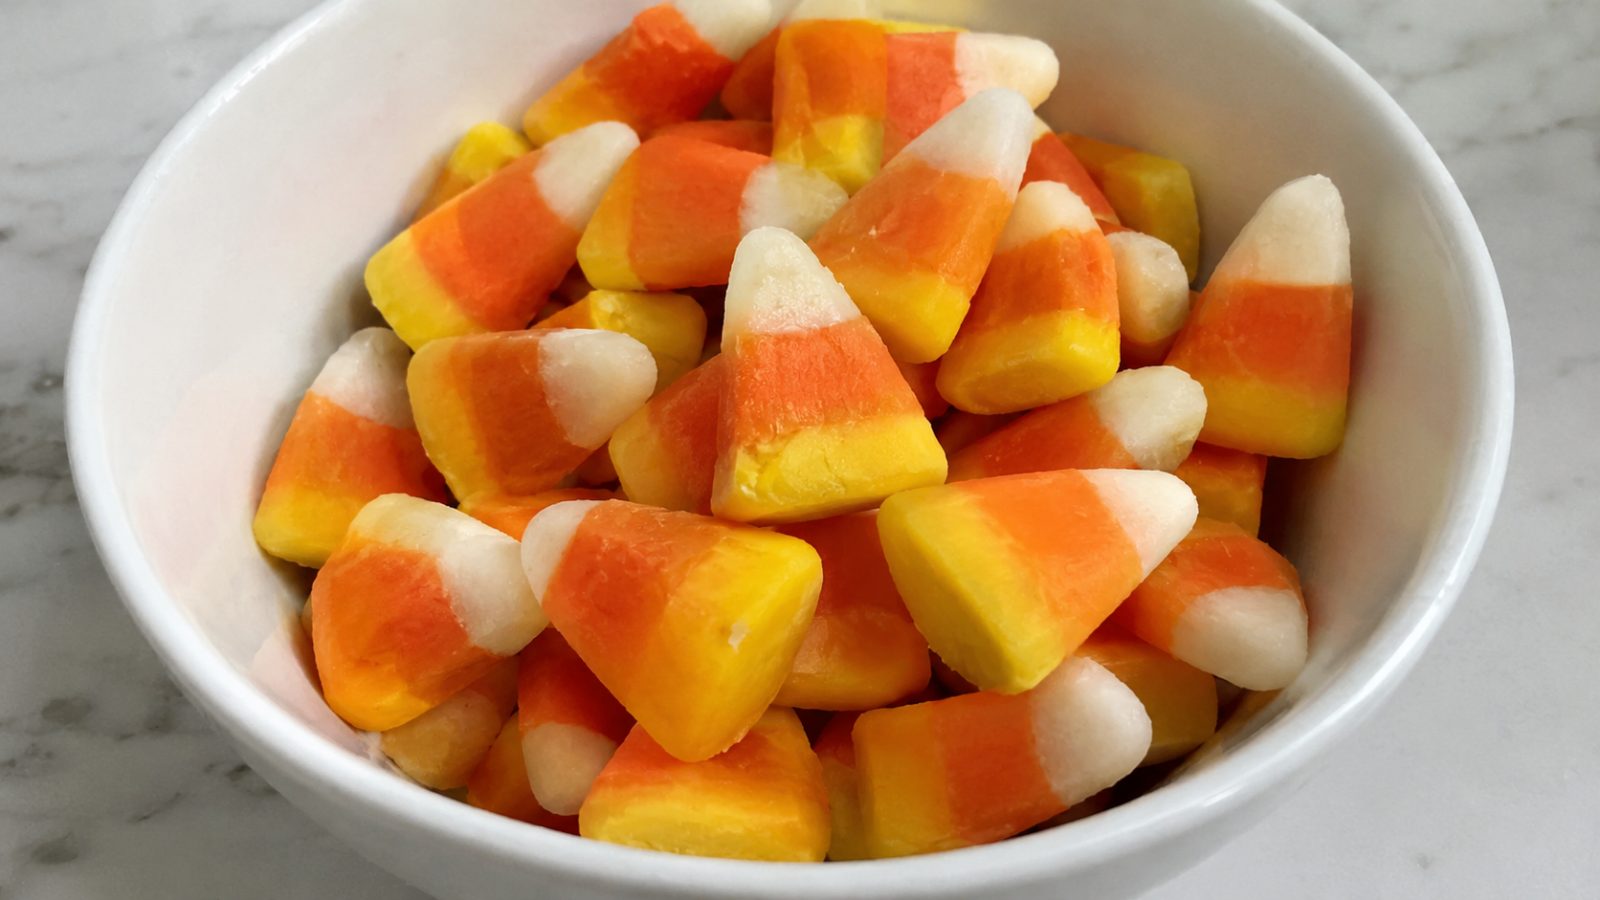
Candy corn has been a fall tradition for well over a century, but the store-bought version is usually packed with corn syrup, confectioner’s glaze, and gelatin or beeswax. If you avoid animal products or just want a simpler ingredient list, it can be hard to find a bag you feel good about. This homemade vegan candy corn recipe (no corn syrup!) solves that with a soft, sweet, vanilla-scented dough that you shape into the classic tricolor triangles by hand. It needs no candy thermometer, no boiling sugar, and no special molds. Everything comes together in about 30 minutes of active work, plus a little drying time.
Key Takeaways
- This candy is fully plant-based and uses agave nectar or brown rice syrup in place of corn syrup.
- The dough is a no-cook method, so there is no thermometer and no risk of burning sugar.
- Natural colors like turmeric, paprika, and carrot powder give you the classic yellow, orange, and white layers.
- The candy needs 12 to 24 hours of air drying to develop its signature chewy-soft bite.
- Stored in an airtight container, it stays fresh for up to two weeks.
Why Make Vegan Candy Corn at Home Without Corn Syrup
Traditional candy corn is made from sugar, corn syrup, and a few binders that make the candy firm and glossy. Many commercial brands also use gelatin or shellac-based glazes, which means they are not suitable for vegans. Even brands that skip those ingredients often rely on artificial dyes and a long list of additives.
Making it yourself gives you control. You choose the sweetener, the coloring, and the flavor. You also get a fresher, softer texture than the waxy, hard pieces that sit on shelves for months. Homemade candy corn tastes like a cross between vanilla fondant and marshmallow, with a gentle creaminess from the milk powder.
There is another benefit that families will appreciate: this is a great kitchen project for kids. Because there is no hot sugar involved, children can help knead the dough, roll the ropes, and press the colored layers together. It becomes a fun fall activity instead of a stressful candy-making session.
Ingredients You Will Need
The ingredient list is short, and most items are easy to find at a regular grocery store or online.
For the candy dough:
- 2 cups powdered sugar, plus extra for dusting
- 1/2 cup coconut milk powder or soy milk powder
- 1/4 teaspoon fine sea salt
- 3 tablespoons agave nectar or brown rice syrup
- 2 tablespoons vegan butter, melted and slightly cooled
- 1 teaspoon pure vanilla extract
- 1 to 2 tablespoons plant milk, only if needed
For natural coloring:
- 1/4 teaspoon turmeric powder for the yellow layer
- 1/4 teaspoon turmeric plus 1/4 teaspoon sweet paprika for the orange layer
- The white layer stays uncolored
A quick note on sugar: some refined white sugar is processed with bone char, so strict vegans often choose organic or certified vegan powdered sugar. Also, most powdered sugar contains a small amount of cornstarch to prevent clumping. That is very different from corn syrup, but if you need to avoid corn entirely, look for a tapioca-based powdered sugar.
Why These Ingredients Work
The powdered sugar forms the structure of the candy and gives it a smooth, fondant-like texture. The milk powder adds the creamy flavor that makes candy corn taste familiar, and it also absorbs moisture so the dough stays pliable instead of sticky. Agave nectar or brown rice syrup acts as the binder that replaces corn syrup, keeping the candy soft and chewy. The vegan butter adds richness and helps the dough hold together when you roll it into ropes.
Equipment
You do not need anything fancy. Gather these tools before you start:
- A large mixing bowl
- A silicone spatula or wooden spoon
- A fine mesh sieve for sifting the powdered sugar
- A clean work surface or silicone baking mat
- A sharp knife or bench scraper
- Parchment paper
- A baking sheet or large plate for drying
A kitchen scale is helpful if you want consistent results, but standard measuring cups work fine for this recipe.
Natural Coloring Options
Part of the fun of candy corn is the bright color, and you can achieve a warm, rustic version of it without any artificial dyes. Turmeric gives a sunny yellow with almost no flavor at this small amount. Mixing turmeric with sweet paprika creates a lovely orange. If you want a deeper orange, a pinch of carrot powder or annatto powder works beautifully.
If you prefer a brighter, more traditional look, you can use plant-based food coloring from a natural brand. Gel colors are more concentrated than liquid ones, so a tiny dab goes a long way. Keep in mind that natural powders create softer, more muted shades, which many people find more charming and autumnal than neon colors.
Step-by-Step Instructions
Step 1: Mix the Dry Ingredients
Sift the powdered sugar and milk powder into a large bowl. Sifting is important because any lumps will show up in the finished candy as gritty spots. Add the salt and whisk everything together until evenly combined.
Step 2: Add the Wet Ingredients
Pour in the agave nectar, melted vegan butter, and vanilla extract. Stir with a spatula until a crumbly dough begins to form. At first it may look too dry, but keep mixing. Use your hands to press and knead the mixture together in the bowl.
If the dough still feels crumbly after a minute of kneading, add the plant milk one teaspoon at a time. Stop as soon as the dough comes together into a smooth ball. It should feel like soft play dough, not sticky and not dry.
Step 3: Divide the Dough
Turn the dough out onto a surface lightly dusted with powdered sugar. Divide it into three equal portions. A kitchen scale makes this easy, but you can also eyeball it by cutting the dough into thirds.
Step 4: Color the Layers
Leave one portion plain for the white tip. Knead the turmeric into the second portion until the color is even, which gives you the yellow tip. Knead the turmeric and paprika into the third portion to create the orange layer. Wear gloves if you do not want orange fingertips, since turmeric stains skin and countertops.
Step 5: Shape the Ropes
Roll each colored portion into a long rope about 12 inches long and 1/2 inch thick. Press each rope gently with your fingers or a rolling pin to flatten it into a long strip about 1 inch wide. Keep the strips even in width so the finished triangles look neat.
Step 6: Stack the Layers
Place the orange strip on your work surface. Lay the yellow strip directly on top of it, pressing lightly so the layers stick together. Add the white strip on top. You now have a tall, three-layer stack with white on top, yellow in the middle, and orange on the bottom.
Gently press down on the whole stack to help the layers bond. If the strips will not stick, brush a tiny amount of water or plant milk between the layers.
Step 7: Cut the Triangles
Using a sharp knife, cut the stack crosswise into small triangle-shaped pieces. To get the classic shape, cut at alternating angles. Make one slanted cut, then flip the direction for the next cut so each piece has a wide base and a narrow tip. Wipe the blade clean between cuts to keep the colors from smearing.
Step 8: Dry the Candy
Arrange the pieces on a parchment-lined baking sheet with a little space between them. Let them air dry uncovered at room temperature for 12 to 24 hours. This step firms up the outside while keeping the inside soft and chewy. In humid weather, drying may take a little longer.
Tips for Perfect Texture
Texture is the most important part of any candy corn, and a few small details make a big difference.
Measure carefully. Too much liquid makes the dough sticky and hard to shape, while too little makes it crack. Add liquid slowly and trust your hands.
Work at room temperature. If your kitchen is warm, the vegan butter can make the dough greasy. Chill the dough for ten minutes if it starts to feel soft.
Keep your work surface lightly dusted. A thin layer of powdered sugar prevents sticking, but too much will dry the dough out and cause cracks.
Cut with a clean, sharp knife. A dull knife squashes the layers and blurs the colors. A bench scraper also works well for clean, straight edges.
Be patient with drying. The candy might feel soft right after cutting, but it firms up considerably overnight. Resist the urge to bake or dehydrate it, which can make the pieces tough.
Troubleshooting Common Problems
The dough is too sticky. Add a tablespoon of powdered sugar or milk powder at a time until it becomes easy to handle.
The dough is crumbly and dry. Knead in a few drops of plant milk or agave nectar. Warm hands help the dough soften.
The colors are bleeding together. This usually happens when the dough is too moist. Let the strips rest for a few minutes before stacking, and dust lightly with powdered sugar.
The layers are separating. Press the stack more firmly or brush a little water between the layers. You can also roll the stack gently with a rolling pin to seal it.
The candy tastes too sweet. Candy corn is naturally very sweet. A pinch more salt can balance the flavor, and a little extra vanilla adds depth.
Flavor Variations
Once you master the basic method, you can experiment with different flavors. Try replacing the vanilla extract with maple extract for a cozy, pancake-like taste. Almond extract adds a bakery-style flavor that pairs well with the white layer. A small pinch of cinnamon or pumpkin pie spice in the orange layer gives the candy an autumn twist.
For a more festive look, make other seasonal color combinations. Brown, orange, and white create a “Indian corn” style candy that looks great in fall candy bowls. Pink, white, and red work well for Valentine’s Day. Green, white, and red turn the same recipe into holiday treats.
Storage and Make-Ahead Tips
Once the candy is dry, store it in an airtight container at room temperature. Place parchment paper between layers so the pieces do not stick together. It will stay fresh for up to two weeks. For longer storage, freeze the candy in a sealed freezer-safe container for up to two months, then thaw at room temperature before serving.
Avoid storing the candy in the refrigerator, since moisture can make the surface sticky. Keep it away from direct sunlight and heat as well, which can soften the layers and fade the natural colors.
If you plan to make candy for a party, you can prepare the dough up to two days ahead. Wrap each colored portion tightly in plastic wrap and keep it in the fridge. Let it come to room temperature before rolling and shaping.
Serving and Gifting Ideas
Homemade candy corn is a lovely gift. Pack it in small cellophane bags tied with ribbon, or place it in mason jars with a handwritten label. It also makes a charming addition to fall dessert boards alongside nuts, dried fruit, and vegan chocolate.
You can scatter the candy over cupcakes, mix it into homemade trail mix, or use it to decorate a Halloween cake. Kids love it in treat bags, and adults enjoy it with a cup of coffee or tea. Because it is allergen-friendly in many ways, it can be easy to adapt for guests with dairy or egg allergies. Just check the milk powder and vegan butter you choose if there are nut or soy concerns.
Frequently Asked Questions
Can I use regular milk powder instead of coconut or soy milk powder?
Regular milk powder will work texture-wise, but it will make the candy non-vegan. For a plant-based result, stick with coconut milk powder, soy milk powder, or another dairy-free powder like oat or rice.
What can I use instead of agave nectar?
Brown rice syrup is the closest substitute and gives a slightly chewier texture. Maple syrup also works, but it adds a distinct flavor and may make the dough a little softer, so you may need extra powdered sugar.
Why does my candy corn feel soft after drying?
Humidity is usually the reason. Let the candy dry for a longer time in a cool, dry room, or place a fan nearby to help air circulate. The inside should always stay slightly soft and chewy.
Is this candy gluten-free?
The basic ingredients are naturally gluten-free, but always check the labels on your powdered sugar, milk powder, and extracts. Some brands process their products in facilities that handle wheat.
Can I make this without any added coloring?
Absolutely. You can leave the dough in its natural off-white color, or use only turmeric for a soft yellow. The flavor will be the same, and the candy will still look charming in simple pale tones.
How long does it take to make from start to finish?
Active preparation takes about 30 minutes. The drying time adds 12 to 24 hours, so plan to make the candy the day before you need it.
This soft, chewy treat proves you do not need corn syrup, gelatin, or artificial dyes to enjoy a fall classic. With a few pantry staples and a little patience, you can turn out a batch of colorful triangles that look and taste wonderful. Whether you are filling Halloween bags, decorating cupcakes, or simply craving something sweet, this homemade vegan candy corn recipe (no corn syrup!) is an easy, kid-friendly project that you will want to make every autumn.