
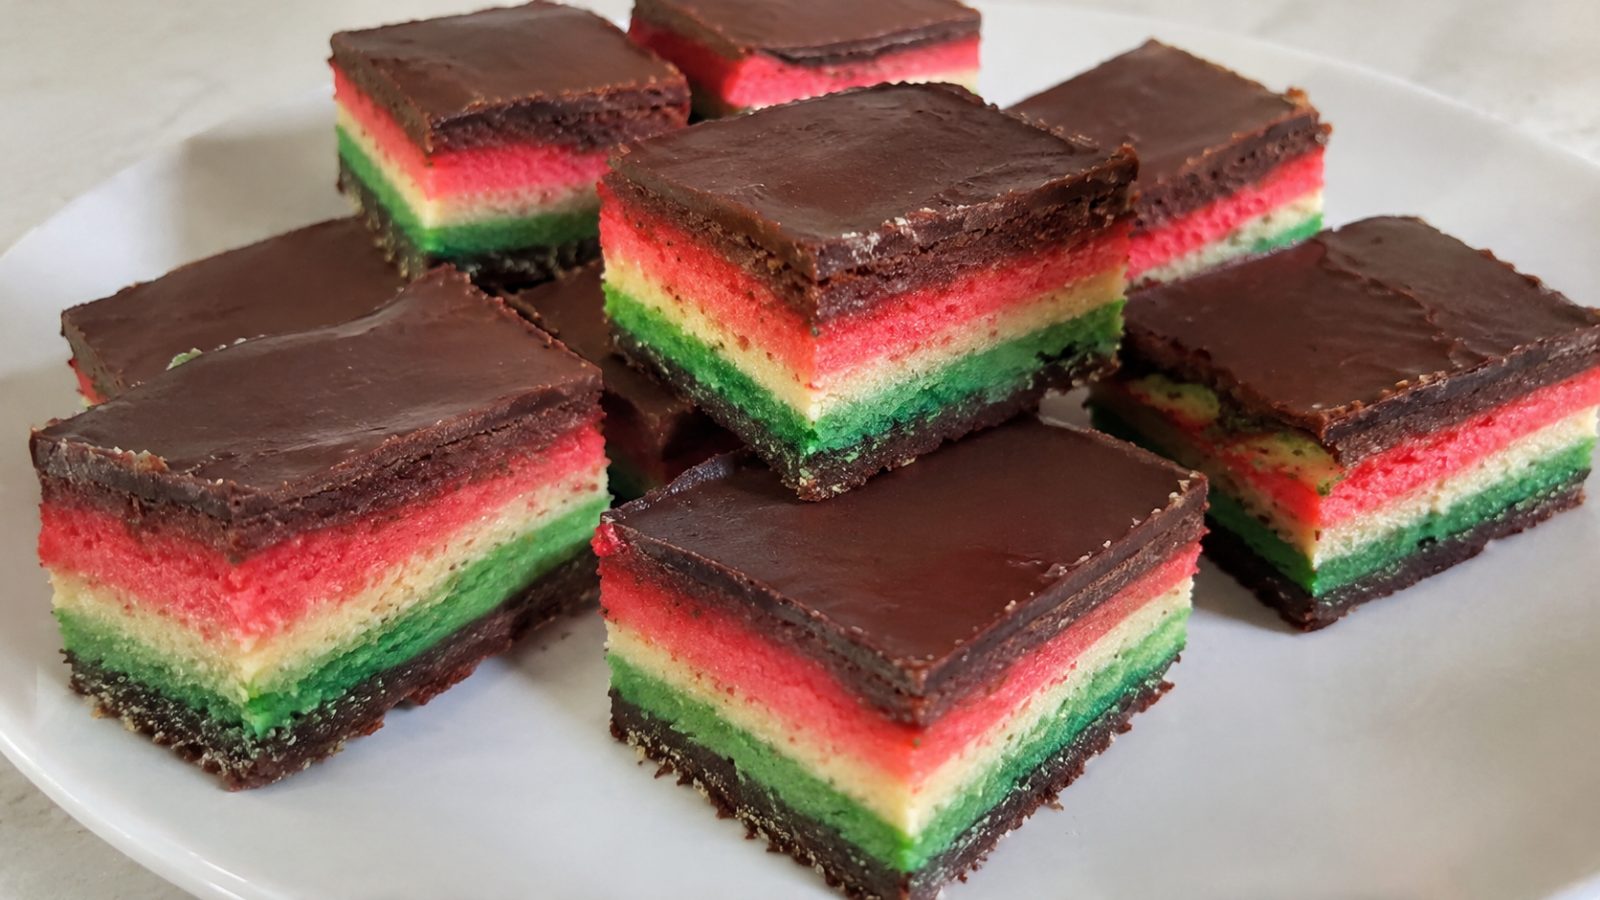
Every December, Italian-American bakeries fill their display cases with trays of red, white, and green cookie bars glazed in dark chocolate. They look like tiny slices of the Italian flag, and they taste like almond, raspberry, and bittersweet chocolate in perfect balance. If you avoid wheat, you may have walked past that case with a pang of longing. This guide changes that. Here you will learn how to bake gluten-free Italian rainbow cookies that are moist, flavorful, and just as beautiful as the classic version, even if you have never baked a layered cookie before.
Key Takeaways
- Rainbow cookies are built on almond paste, so they are already close to gluten-free, and only a small amount of flour needs replacing.
- A good gluten-free 1-to-1 flour blend with xanthan gum already included gives the most reliable texture.
- Whipped egg whites folded into the batter keep the thin layers light instead of dense.
- Pressing the assembled cake under a weight overnight is the secret to clean slices and a fudgy bite.
- Always check labels on almond paste, jam, chocolate, and extracts, since hidden gluten can appear in unexpected places.
What Are Italian Rainbow Cookies?
Italian rainbow cookies go by several names, including tricolor cookies, Neapolitan cookies, seven-layer cookies, and Venetian cookies. Despite the names, they are not a traditional recipe from Italy itself. They grew out of Italian immigrant bakeries in the United States, where bakers adapted European almond-paste traditions into a cake-like bar that mirrors the colors of the Italian flag.
The cookie is really a thin cake. Three almond-flavored sponge layers, one tinted red, one left natural, and one tinted green, are baked separately, stacked with raspberry or apricot jam between each, then coated on top and bottom with melted chocolate. After a night in the refrigerator, the whole block is sliced into small rectangles. The texture is soft and slightly chewy, somewhere between marzipan and a moist almond cake.
Why This Cookie Works So Well Without Gluten
Most layered cakes depend heavily on wheat flour for structure. Rainbow cookies are different. The bulk of the body comes from almond paste, butter, sugar, and eggs. Flour is only a supporting player, which is exactly why this cookie adapts so beautifully to a gluten-free kitchen.
Almond paste brings natural moisture and a built-in tenderness that gluten-free baked goods often lack. The whipped egg whites supply lift and airiness, and the jam layers add even more softness as they settle into the cake overnight. In other words, the original recipe already does much of the work that gluten-free bakers usually struggle to achieve.
Ingredients You Will Need
For the cake layers:
- 8 ounces (225 g) almond paste, broken into small pieces
- 1 cup (225 g) unsalted butter, softened
- 1 cup (200 g) granulated sugar
- 4 large eggs, separated, at room temperature
- 1 teaspoon pure almond extract
- 2 cups (about 280 g) gluten-free 1-to-1 baking flour blend that contains xanthan gum
- 1/2 teaspoon fine salt
- Red and green gel food coloring
For assembly and finishing:
- 1/2 cup seedless raspberry jam
- 1/2 cup apricot preserves, strained
- 12 ounces (340 g) semisweet or bittersweet chocolate, chopped
- 1 tablespoon neutral oil or shortening, for a glossy glaze
Gel coloring is better than liquid because it gives vivid shades without thinning the batter. If your flour blend does not contain xanthan gum, add 3/4 teaspoon to the dry ingredients.
Choosing the Right Gluten-Free Flour
The flour you pick matters more than any other decision in this recipe. Blends built on a mix of white rice flour, brown rice flour, potato starch, and tapioca starch tend to perform best, because they bake up soft and neutral in flavor. Blends heavy in bean flours can taste earthy and clash with the delicate almond flavor.
Weigh your flour rather than scooping it. Gluten-free flours pack down easily, and a cup measured by volume can vary by 30 grams or more. Too much flour makes the layers dry and crumbly, while too little makes them fragile and greasy. A kitchen scale removes the guesswork and gives you the same result every time.
How to Make Rainbow Cookies Without Gluten, Step by Step
Step 1: Prepare Your Pans
Heat the oven to 350°F (175°C). Line three 9 by 13 inch pans, or three quarter-sheet pans, with parchment paper and lightly grease the parchment. If you only own one or two pans, you can bake the layers in batches. Just let the pan cool completely and re-line it between rounds.
Step 2: Cream the Almond Paste, Butter, and Sugar
In a large bowl or stand mixer, beat the almond paste and sugar together on medium speed until the mixture looks like coarse, damp sand. Add the softened butter and beat for 3 to 4 minutes, until pale and fluffy. Take your time here. Any stubborn lumps of almond paste will stay in the baked cake, so keep mixing until the batter is smooth.
Add the egg yolks one at a time, beating well after each, then mix in the almond extract.
Step 3: Add the Dry Ingredients
Whisk the flour blend and salt together, then add them to the butter mixture on low speed. Mix just until no dry streaks remain. The batter will be thick and slightly sticky, which is normal for gluten-free dough.
Step 4: Whip and Fold the Egg Whites
In a clean, grease-free bowl, whip the egg whites to stiff, glossy peaks. Fold about one third of the whites into the batter to lighten it, then gently fold in the remaining whites in two additions. Work with a wide spatula and use slow, sweeping motions. The goal is to keep as much air as possible, since these whites are your only leavening.
Step 5: Divide and Color the Batter
Weigh the batter and divide it into three equal portions. Leave one portion plain. Tint one portion with red gel coloring until it is a soft pink-red, and tint the third with green gel coloring. Remember that the colors will deepen slightly as they bake, so stop a shade lighter than your target.
Step 6: Spread the Layers
Spread each portion into its own prepared pan. The layers will be very thin, roughly one quarter of an inch, so use an offset spatula and press the batter right into the corners. Wet the spatula slightly if the batter sticks to it.
Step 7: Bake
Bake for 12 to 15 minutes, until the edges just begin to set and a toothpick comes out clean. The layers should not brown. Overbaking is the number one cause of dry rainbow cookies, so pull them as soon as they look set. Cool completely in the pans on a wire rack.
Assembling the Layers
Assembly is where the cookie takes shape, and a little patience goes a long way.
Warm the raspberry jam and the strained apricot preserves in separate small bowls for about 15 seconds each, just enough to make them spreadable. Place the green layer on a parchment-lined tray and spread it evenly with the raspberry jam. Top it with the plain layer, spread that with apricot preserves, and finish with the red layer.
Cover the stack with parchment, set a flat pan or cutting board on top, and weigh it down with a couple of cans. Refrigerate for at least 8 hours or overnight. Pressing fuses the layers together, helps the jam soak into the cake, and prevents the slices from sliding apart when you cut them.
Glazing and Slicing
Melt the chocolate and oil together gently, either in a double boiler or in the microwave in 30 second bursts, stirring between each. Trim the edges of the chilled cake with a long knife if you want perfectly clean sides, then lift off the weight.
Spread half of the chocolate over the top layer in a thin, even coat and chill until firm, about 20 minutes. Flip the cake carefully, peel away the parchment, and coat the other side with the remaining chocolate. Chill again until set.
To slice, warm a sharp chef’s knife under hot water, wipe it dry, and cut the block into long strips, then into small rectangles about one inch wide. Wipe the blade between cuts for the neatest edges. Many bakers also trim the four outer edges before slicing so every piece shows off its crisp stripes.
Troubleshooting Common Problems
The layers are dry or crumbly. This usually means the flour was measured by volume or the cake was overbaked. Weigh your flour and watch the oven closely during the last few minutes.
The batter looks curdled. Cold eggs or butter can cause this. Bring everything to room temperature before you begin, and the batter will come together smoothly.
The layers are dense. The egg whites were probably deflated during folding. Fold gently and stop as soon as no white streaks remain.
The chocolate cracks when you slice. Adding a little oil or shortening to the chocolate keeps it flexible. Also use a warm knife and cut with a gentle sawing motion rather than pressing straight down.
The colors look dull. Switch to gel food coloring and add it gradually. Liquid coloring can mute the shade and loosen the batter.
Keeping Your Cookies Safe for a Gluten-Free Diet
If you are baking for someone with celiac disease, ingredients and cross-contact both matter. Almond paste is usually gluten-free, but some brands add wheat-based fillers or are processed in shared facilities, so read the label carefully. Check jam, chocolate, almond extract, and food coloring for gluten-free labeling as well.
Use clean pans, bowls, and utensils, and avoid wooden spoons or scratched nonstick surfaces that may harbor traces of wheat flour from previous baking. Parchment paper, a dedicated sifter, and freshly washed equipment help keep the kitchen safe. When in doubt, choose products with a certified gluten-free seal.
Variations to Try
Once you have mastered the base recipe, there are plenty of ways to make it your own.
- Lemon twist: Replace the almond extract in one layer with lemon zest and a teaspoon of lemon juice for a bright, citrusy note.
- Pistachio layer: Swap the green coloring for finely ground pistachios folded into the batter for a natural color and nutty flavor.
- Dark and white chocolate: Coat one side in dark chocolate and drizzle white chocolate over the top for a bakery-style finish.
- Dairy-free version: Use a dairy-free butter substitute in stick form and dairy-free dark chocolate. Check that the jam and almond paste are also free of dairy.
- Different jams: Apricot and raspberry are classic, but sour cherry or blackberry preserves create a deeper, more complex flavor.
Storage and Make-Ahead Tips
Store sliced rainbow cookies in an airtight container in the refrigerator for up to one week. Place parchment between layers of cookies so the chocolate does not stick. They taste best after resting for a day or two, when the almond flavor has mellowed and the jam has fully softened the cake.
For longer storage, freeze them in a single layer until firm, then transfer to a freezer-safe container for up to three months. Thaw overnight in the refrigerator, and let them sit at room temperature for 15 minutes before serving. Because they keep so well, rainbow cookies are an ideal make-ahead treat for holiday cookie boxes, weddings, and dessert tables.
Frequently Asked Questions
Can I make rainbow cookies without almond paste?
It is possible, but the flavor and texture will change noticeably. You can replace almond paste with extra almond flour, sugar, and a little almond extract, though the result will be slightly less moist and less chewy. Almond paste is worth seeking out for the authentic taste.
Why do I need to press the cake overnight?
Pressing compacts the layers and helps the jam bond them together. It also gives the cookies their signature dense, fudgy bite and makes slicing much cleaner. Skipping this step often leads to crumbling or sliding layers.
What is the best gluten-free flour for this recipe?
A 1-to-1 blend containing rice flour and starches, with xanthan gum already added, works best. Avoid blends dominated by bean or sorghum flours, since their stronger flavors can overpower the almond. Always weigh the flour for accuracy.
Can I use liquid food coloring instead of gel?
You can, but gel coloring is strongly recommended. Liquid coloring adds extra moisture and tends to produce paler colors. Gel gives rich, bright layers using only a few drops.
How far in advance can I make these cookies?
You can bake and assemble them up to a week ahead and keep them refrigerated, or freeze them for up to three months. Their flavor actually improves after a day or two of resting.
Rainbow cookies reward patience, and this version proves that giving up gluten does not mean giving up tradition. With soft almond layers, tangy jam, and a snap of dark chocolate in every bite, they are just as impressive as anything in a bakery case. Bake a tray, slice them into neat little stripes, and share them with people who will not guess what is missing. Once you try your first batch of gluten-free Italian rainbow cookies, they may become the star of your holiday baking every year.