
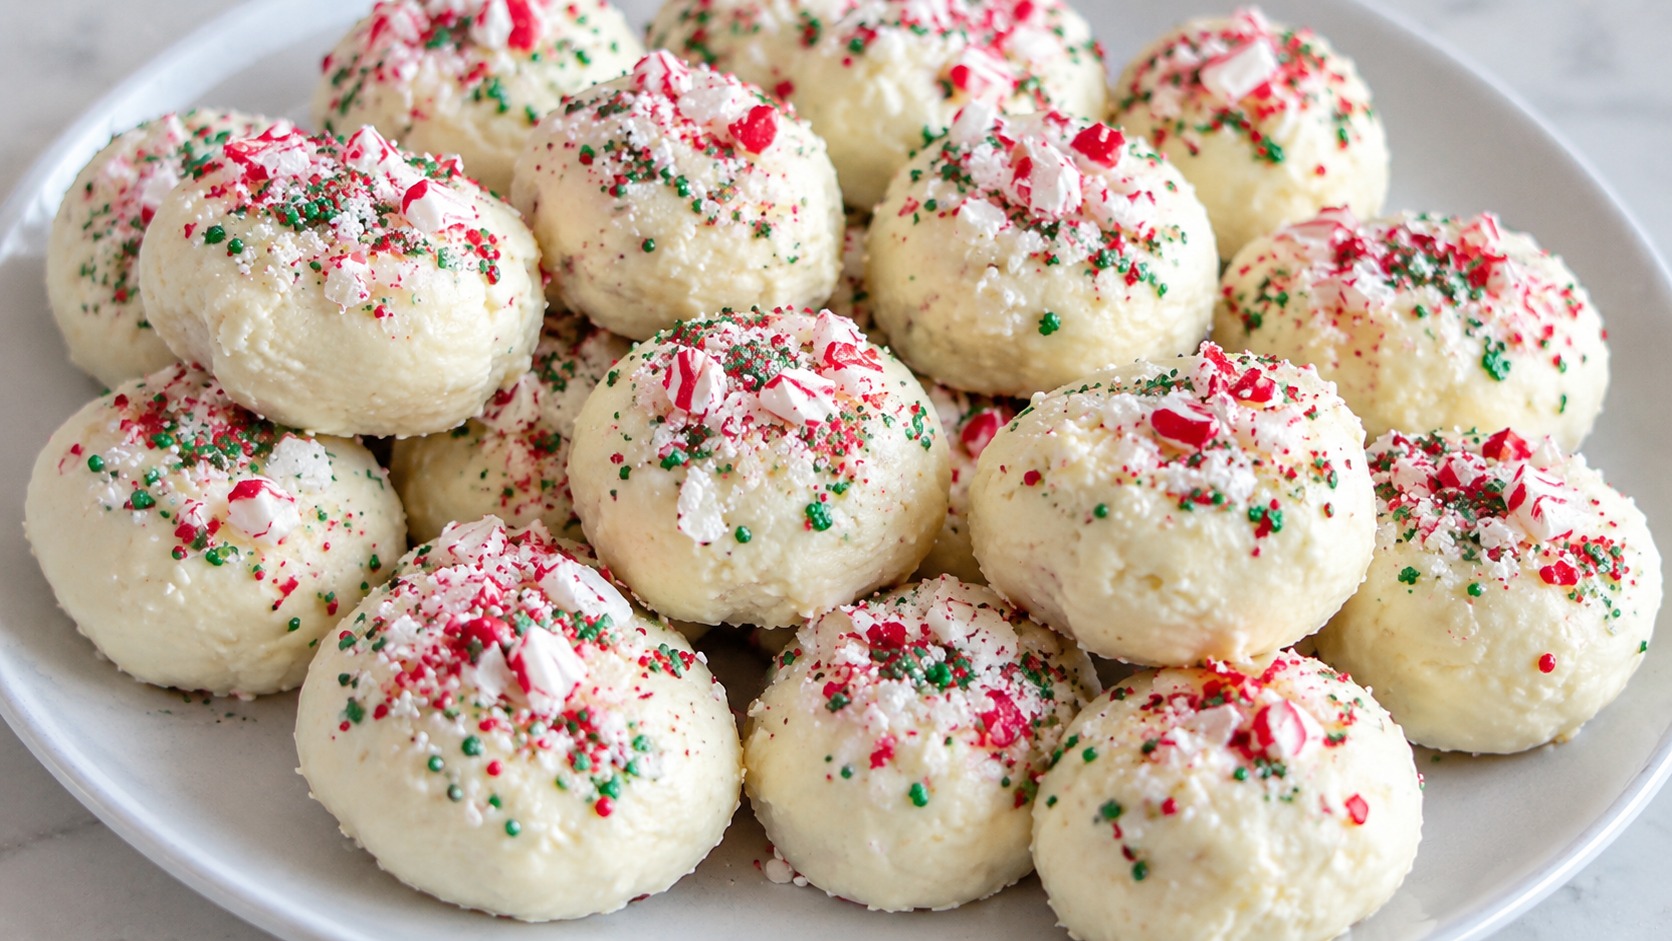
This Easy Holiday Cream Cheese Mints Recipe is exactly what you need. These little candies have been a staple at family gatherings, baby showers, weddings, and holiday parties for generations, and for good reason. They are simple to make, require no oven time, and can be shaped and colored to match any occasion. With just a handful of pantry staples and a little bit of patience for chilling, you can whip up a batch of these melt-in-your-mouth mints in under an hour.
Whether you are hosting a Christmas cookie exchange, packing goodie bags for New Year’s Eve, or simply craving a creamy, sugary bite of nostalgia, this recipe delivers every time.
Key Takeaways
- Cream cheese mints require only five basic ingredients and no baking.
- They can be tinted with food coloring and shaped using small candy molds or your hands.
- Mints need to chill for several hours (or overnight) to firm up properly.
- This recipe is naturally customizable with different extracts like peppermint, almond, or vanilla.
- Mints store well in the refrigerator or freezer, making them perfect for advance holiday prep.
Why Cream Cheese Mints Are a Holiday Favorite
There is something undeniably charming about a plate of pastel colored mints sitting next to a tray of cookies and fudge. Cream cheese mints have a rich history at Southern celebrations, and over time they have become a beloved addition to holiday spreads across the country. Their appeal lies in their simplicity. Unlike many holiday desserts that demand precise baking times, careful temperature control, or complicated decorating skills, these mints come together with basic mixing and shaping.
The texture is what truly sets them apart. Because they are made primarily from cream cheese and powdered sugar, they have a soft, almost fondant-like consistency that melts smoothly in your mouth. A splash of peppermint extract gives them that classic wintery flavor, though you can easily swap in other extracts depending on your preference or the occasion.
Another reason these treats remain popular during the holidays is their visual versatility. A few drops of red or green food coloring instantly transform plain white mints into festive, eye-catching candies. Roll them in colored sugar, press them into small molds shaped like holly leaves or snowflakes, or simply flatten them with a fork for a classic look. However you choose to style them, they always look like they took far more effort than they actually did.
Ingredients You Will Need
Making these mints does not require a trip to a specialty store. Most of the ingredients are things you likely already have in your kitchen or can pick up at any regular grocery store.
- 8 ounces of softened cream cheese (full-fat works best for texture)
- 4 to 5 cups of powdered sugar, sifted
- 1 to 2 teaspoons of peppermint extract (or your preferred flavor)
- A pinch of salt to balance the sweetness
- Food coloring in your desired holiday shades
- Granulated sugar for rolling, optional
That is truly all it takes. No eggs, no flour, no baking soda. Just a few simple items combined in the right way to create something that feels far more indulgent than the ingredient list suggests.
Step-by-Step Instructions
Preparing the Dough
Start by making sure your cream cheese is fully softened at room temperature. This step matters more than people realize. Cold cream cheese will not blend smoothly, and you will end up with lumps that are difficult to work out later. Once softened, place the cream cheese in a large mixing bowl and beat it until it is completely smooth and creamy.
Add your peppermint extract and a small pinch of salt, then mix again until everything is evenly incorporated. The salt might seem unnecessary in a sweet recipe, but it actually helps cut through the richness of the cream cheese and keeps the final product from tasting flat.
Next comes the powdered sugar. Add it gradually, about a cup at a time, mixing thoroughly after each addition. This slow approach prevents a sugar cloud from taking over your kitchen and also gives you better control over the final texture. You are looking for a dough that is firm enough to hold its shape but still soft enough to roll or press into molds. Depending on humidity and the exact moisture content of your cream cheese, you may need slightly more or less sugar than the recipe calls for.
Coloring and Shaping
If you want colored mints, this is the point where you divide the dough into separate bowls and add a few drops of food coloring to each. Gel-based food coloring tends to work better than liquid drops because it provides vibrant color without adding excess moisture to the dough. Knead the color in gently until it is evenly distributed.
Once your dough is ready, you have a few shaping options. The traditional method involves rolling small balls of dough, about the size of a marble, then pressing them lightly with the tines of a fork to create a ridged pattern. Alternatively, you can press the dough into small silicone candy molds shaped like holiday icons such as trees, stars, or wreaths for a more decorative presentation.
If you prefer the classic look, rolling the shaped mints in granulated sugar before setting them out adds a subtle sparkle and a slightly different textural contrast.
Chilling and Setting
This is the step that requires patience, though it demands none of your active attention. Arrange your shaped mints on a parchment-lined baking sheet, making sure they are not touching each other. Place the sheet in the refrigerator and allow the mints to chill for at least two hours, though overnight is ideal for the firmest texture.
As the mints chill, the cream cheese solidifies and the sugar sets, giving the candies their signature firm-yet-soft bite. Skipping this step or rushing it will leave you with mints that are too soft to hold their shape once removed from the tray.
Tips for the Best Results
A few small details can make a noticeable difference in how your mints turn out. First, always sift your powdered sugar before adding it to the dough. Clumps of sugar can create uneven texture and make the mixing process more difficult than it needs to be.
Second, resist the urge to add extract in large amounts all at once. Peppermint extract in particular is potent, and a little goes a long way. Start with less than you think you need, taste the dough, and adjust gradually.
Third, keep your hands lightly dusted with powdered sugar while shaping the mints. The dough can become sticky, especially in warmer kitchens, and a light dusting prevents it from clinging to your fingers.
Finally, work in batches if you are making multiple colors. Cleaning your hands and tools between colors keeps everything looking crisp and prevents muddy color blending.
Storage and Make-Ahead Advice
One of the best things about this treat is how well it holds up over time, which makes it perfect for holiday planning when your schedule is already packed. Once fully set, store the mints in an airtight container in the refrigerator, where they will stay fresh for up to two weeks. Layer sheets of parchment or wax paper between them if you are stacking multiple layers to prevent sticking.
For even longer storage, these mints freeze beautifully. Place them in a freezer-safe container, again separated by parchment paper, and they will keep well for up to three months. When you are ready to serve them, simply move them to the refrigerator for a few hours or let them sit at room temperature for about fifteen minutes before setting them out.
This make-ahead flexibility is part of why so many home cooks turn to this recipe during the busiest weeks of the year. You can prepare a batch weeks in advance, tuck it away in the freezer, and pull it out exactly when you need a quick, homemade addition to your dessert table.
Flavor and Style Variations
While peppermint is the classic choice for winter holidays, this base recipe is easy to adapt. Swapping in almond extract creates a flavor reminiscent of classic wedding mints, making the same dough suitable for spring celebrations as well. Vanilla extract offers a milder, more universally appealing flavor if you are serving a crowd that may not love strong peppermint.
For color themes beyond red and green, consider pastel shades for a baby shower, deep purple and gold for a New Year’s Eve gathering, or classic white and silver for an elegant winter wedding. The dough itself does not change, only the extract and coloring, which means this single base recipe can serve as the foundation for treats across an entire year of celebrations.
Some bakers also like to add a light dusting of edible glitter or luster dust once the mints have set, giving them a subtle shimmer that catches the light beautifully on a dessert table.
Serving Suggestions
These mints shine as part of a larger holiday dessert spread. Arrange them alongside cookies, fudge, and other bite-sized sweets on a tiered tray for a classic presentation. They also work wonderfully as a palate cleanser between richer desserts, since their light, sweet flavor offers a refreshing contrast.
For gifting, place a small assortment in a decorative tin or cellophane bag tied with ribbon. Because they travel well and do not require refrigeration for short periods, they make an easy homemade gift for neighbors, teachers, or coworkers during the busy holiday season.
Frequently Asked Questions
Can I make these mints without a candy mold? Yes, absolutely. Simply roll the dough into small balls and press them gently with a fork to create the classic ridged pattern. Molds are optional and mainly used for decorative shaping.
Why is my dough too sticky to work with? This usually means more powdered sugar is needed. Add it a tablespoon at a time until the dough firms up enough to hold its shape without sticking excessively to your hands.
Can I use low-fat cream cheese instead of full-fat? Full-fat cream cheese is recommended because it provides the richest texture and helps the mints set properly. Low-fat versions contain more moisture, which can result in a softer, less stable final product.
How far in advance can I make these for a holiday party? You can prepare them up to two weeks ahead if stored in the refrigerator, or up to three months ahead if frozen. This makes them ideal for spreading out holiday prep over several weeks.
Do these need to be refrigerated once served? For short periods at room temperature, such as during a party, they are fine left out. For longer storage, return them to the refrigerator to maintain their texture and freshness.
Can I double the recipe for a larger gathering? Yes, this recipe doubles or even triples easily. Just be sure to mix in batches if your bowl is small, and allow slightly more chilling time since larger batches may take a bit longer to firm up completely.
Making your own batch of mints at home is a small tradition that brings a lot of joy with very little effort. Once you try this Easy Holiday Cream Cheese Mints Recipe, it may just become a permanent fixture on your dessert table every year, passed down the same way so many family recipes are, one batch at a time.