
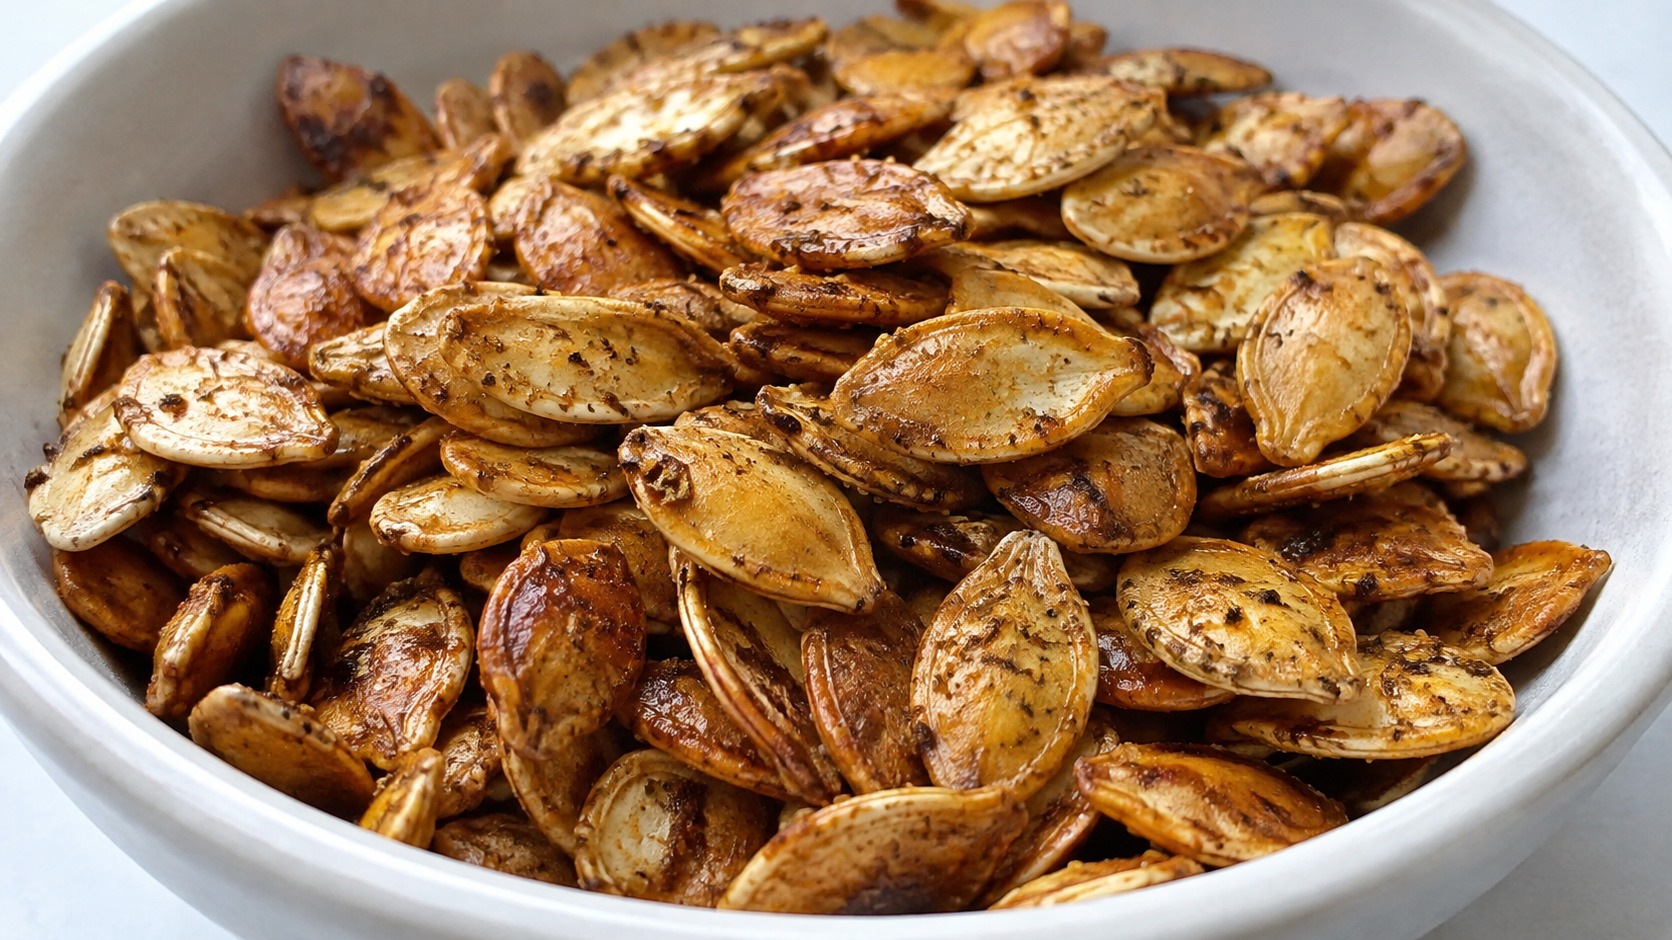
There is nothing quite like the smell of a tray of crispy roasted pumpkin seeds coming out of the oven. Whether you scooped them fresh from a jack-o’-lantern or grabbed a bag of raw seeds at the store, turning them into a crunchy, savory snack is easier than most people think. The secret lies in a few simple steps: cleaning the seeds properly, drying them thoroughly, seasoning them well, and roasting them at the right temperature. In this guide, you’ll learn exactly how to get that satisfying crunch every single time, along with tips for flavor variations, storage, and troubleshooting common mistakes.
Key Takeaways
- Dry the seeds completely before roasting; moisture is the number one enemy of crunch.
- Roast at a moderate oven temperature (around 325°F to 350°F) and stir often for even browning.
- A thin, single layer on the baking sheet prevents steaming and sogginess.
- Season after a light oil coating so spices stick evenly to every seed.
- Let the seeds cool fully on the pan; they continue to crisp up as they cool.
Why Pumpkin Seeds Make Such a Great Snack
Pumpkin seeds, sometimes called pepitas when hulled, are packed with protein, healthy fats, magnesium, and zinc. They’re naturally gluten free, easy to portion, and far more satisfying than many packaged snacks because of their fiber and fat content. Beyond the nutritional case, there’s also the seasonal joy of them. Every autumn, millions of pumpkins get carved for Halloween decorations, and the seeds inside are often thrown away without a second thought. That’s a shame, because with a little effort those seeds can become one of the tastiest bites of the fall season.
Store-bought raw pumpkin seeds work just as well if you don’t happen to have a fresh pumpkin on hand. The techniques below apply to both fresh-from-the-pumpkin seeds and pre-packaged raw seeds, with a couple of small adjustments noted where they matter.
Choosing and Preparing Your Pumpkin Seeds
If you’re starting with a whole pumpkin, cut it open and scoop out the stringy pulp and seeds together. Place everything in a large bowl of water. The seeds will float to the top while the pulp sinks, which makes separating them much easier. Pick out the seeds by hand, rinse them in a colander under cool running water, and remove any remaining strands of pulp.
If you’re using seeds from a bag, you can skip straight to the rinsing step, though a quick rinse still helps remove any dust or residue from packaging.
How to Get Crispy Roasted Pumpkin Seeds Every Time
Getting a reliably crunchy result comes down to three factors: moisture removal, oil ratio, and roasting temperature.
Dry them thoroughly. After rinsing, spread the seeds out on a clean kitchen towel or paper towels and let them air dry for at least 30 minutes, or pat them dry and let them sit uncovered for a few hours if you have the time. Any leftover moisture will turn to steam in the oven, and steam is what leads to soft, chewy seeds instead of crisp ones.
Use just enough oil. A tablespoon of oil per cup of seeds is usually plenty. Too much oil makes the seeds greasy and can actually slow down crisping because the oil takes longer to evaporate. Olive oil, melted butter, and avocado oil all work well, each lending a slightly different flavor profile.
Roast low and slow, not hot and fast. A common mistake is cranking the oven up high to speed things along. High heat tends to burn the outside of the seed shell before the inside has had a chance to dry out and crisp. A steady 325°F to 350°F oven, with stirring every 10 minutes or so, gives you an even, golden result without scorched edges.
Step-by-Step Roasting Method
- Preheat your oven to 325°F (163°C).
- Toss the dried seeds in a bowl with one tablespoon of oil per cup of seeds.
- Add salt and any other seasonings you like, then toss again until evenly coated.
- Spread the seeds in a single layer on a parchment-lined baking sheet, making sure they don’t overlap.
- Roast for 20 to 30 minutes, stirring every 10 minutes, until the seeds are golden brown and fragrant.
- Remove from the oven and let them cool completely on the pan. They will crisp up further as they cool, so resist the urge to taste-test too early.
Flavor Variations Worth Trying
Plain sea salt is a classic for a reason, but pumpkin seeds are a blank canvas for all sorts of flavor combinations. Here are a few reader favorites:
- Sweet and spicy: Toss with a bit of maple syrup, cinnamon, and a pinch of cayenne before roasting.
- Savory garlic parmesan: Mix in garlic powder, grated parmesan, and cracked black pepper after roasting while the seeds are still warm, so the cheese melts slightly and clings to each seed.
- Smoky chili lime: Combine chili powder, smoked paprika, lime zest, and a touch of salt.
- Curry spiced: Use curry powder, a dash of turmeric, and a small amount of honey for balance.
- Ranch style: A store-bought ranch seasoning packet mixed with the oil gives a tangy, herby coating that’s a hit with kids.
Whichever direction you go, the underlying method stays the same. It’s the drying and roasting technique that determines texture, while the seasoning is really just the finishing touch.
Common Mistakes That Ruin the Crunch
Even experienced home cooks run into a few recurring issues:
- Skipping the drying step. This is the single biggest cause of soggy seeds.
- Overcrowding the pan. Seeds piled on top of each other steam instead of roast. Use two pans if needed.
- Not stirring often enough. Seeds on the edges of the pan brown faster than those in the center, so stirring evens things out.
- Pulling them out too early. Seeds often look slightly soft straight out of the oven but firm up significantly as they cool. Give them a full 10 to 15 minutes on the pan before judging the texture.
- Using too much salt before roasting. Salt can draw out moisture during roasting, which sometimes leads to uneven browning. Some cooks prefer salting immediately after roasting instead.
Storing Your Roasted Seeds
Once fully cooled, store the seeds in an airtight container at room temperature. They’ll typically stay crisp for one to two weeks if kept away from humidity. If you notice them softening after a few days, a quick five-minute stint in a 300°F oven will usually restore the crunch. For longer storage, keep them in the refrigerator for up to a month, or freeze them in a sealed bag for up to three months, though freezing can slightly soften the texture once thawed.
Frequently Asked Questions
Do I need to remove the pulp before roasting pumpkin seeds? Yes, removing as much pulp as possible helps the seeds dry faster and roast more evenly. A quick soak in water makes the pulp easier to separate before rinsing.
Can I roast pumpkin seeds without oil? You can, though a light coating of oil helps seasonings stick and encourages more even browning. If you’re avoiding oil, try a light spritz of cooking spray instead.
Why are my roasted pumpkin seeds chewy instead of crunchy? The most common cause is leftover moisture from an insufficient drying time, though underbaking or overcrowding the pan can also lead to a chewier texture.
What temperature is best for roasting pumpkin seeds? A moderate oven temperature between 325°F and 350°F tends to produce the most even, golden results without burning the outer shell.
How long do roasted pumpkin seeds last? Stored in an airtight container at room temperature, they typically stay fresh and crunchy for one to two weeks.
Can I eat the shell, or should I hull the seeds first? Whole pumpkin seeds, shell included, are perfectly edible and provide extra fiber. If you prefer a softer bite, look for hulled seeds, often labeled as pepitas, at the store.
A tray of golden, crunchy pumpkin seeds is one of those simple kitchen wins that costs almost nothing and takes very little hands-on effort. Dry your seeds well, keep the oil light, roast them low and slow, and let them cool before digging in. Once you’ve nailed the basic method for crispy roasted pumpkin seeds, experimenting with different seasonings becomes the fun part, turning a humble kitchen scrap into a snack worth making on purpose, pumpkin or no pumpkin.