
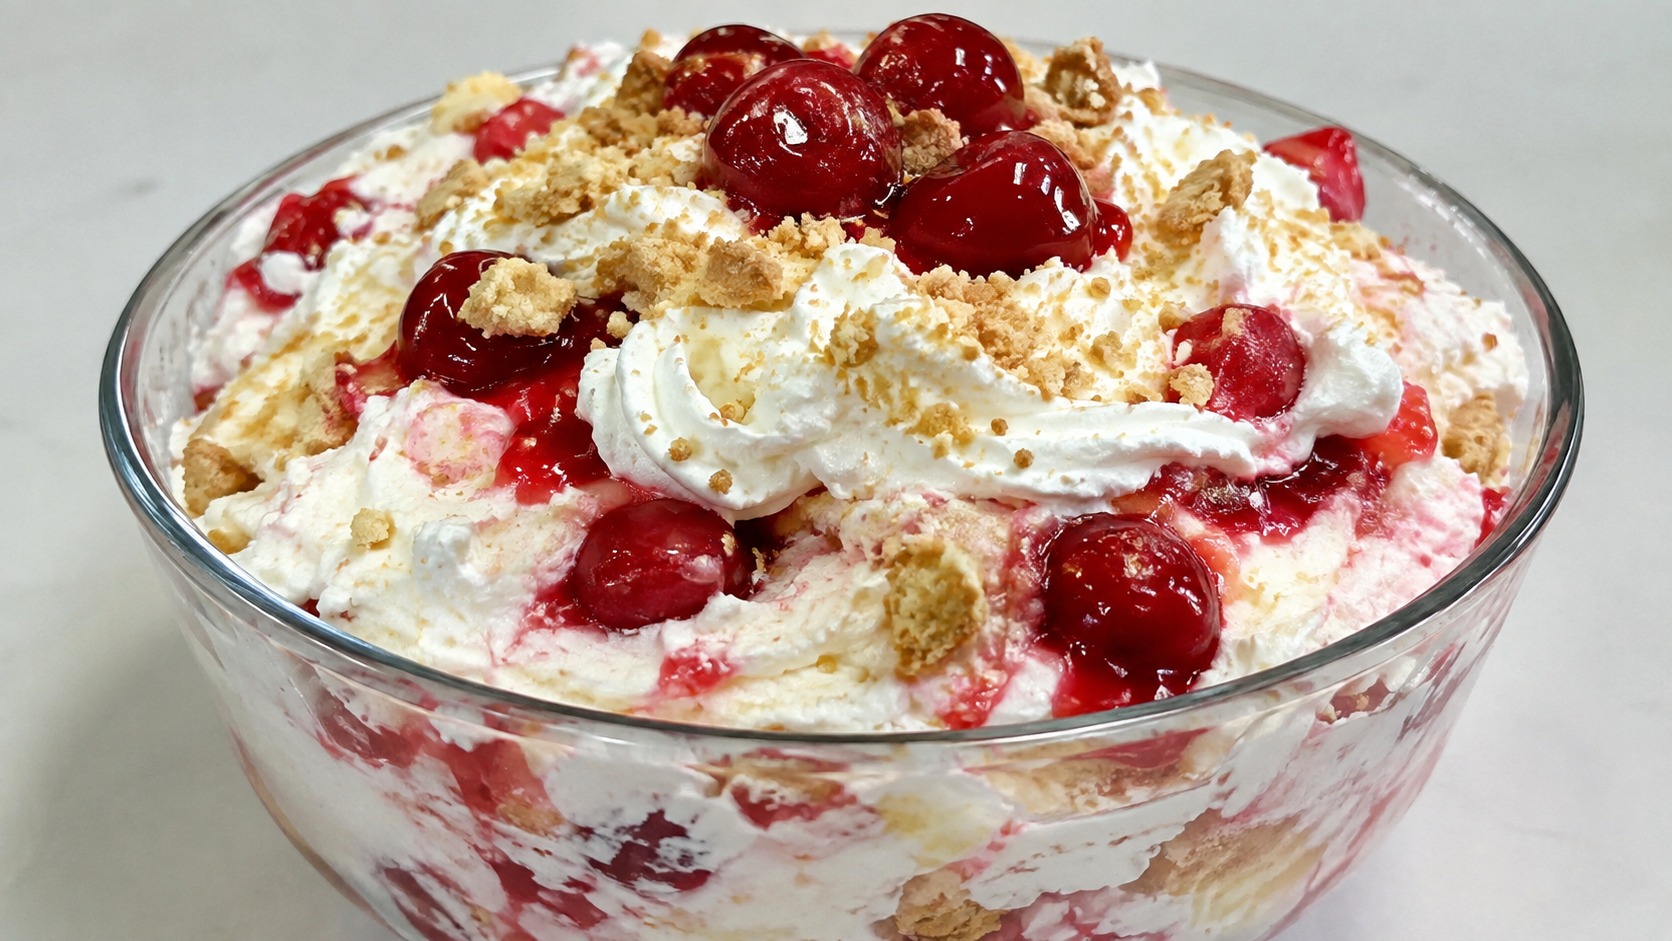
If you need a dessert that comes together in minutes and still tastes like something you fussed over for hours, cherry cheesecake fluff is the answer. This creamy, cloud-like treat blends the tang of cream cheese, the sweetness of whipped topping, and the bright pop of cherry pie filling into one bowl of pure comfort. There is no oven involved, no water bath, and no waiting for a crust to bake and cool. It is the kind of recipe that shows up at potlucks, holiday tables, and weeknight cravings alike, and it disappears just as fast as it is made.
Key Takeaways
- This dessert requires no baking and comes together in under 20 minutes.
- The base is simple: cream cheese, whipped topping, sweetened condensed milk, and cherry pie filling.
- It can be served as a standalone bowl of fluff, layered in a trifle, or piped into individual cups.
- It stores well in the refrigerator for several days, making it a great make-ahead option.
- Small swaps like different fruit fillings or crushed cookies let you customize it endlessly.
What Makes This Dessert So Popular
There is something about a no-bake dessert that feels like a small kitchen victory. You do not need special equipment, advanced technique, or a lot of patience. A hand mixer, a large bowl, and a spatula are really all it takes. The texture is soft and airy, somewhere between a mousse and a light cheesecake filling, and the cherries add just enough tartness to balance out the sweetness of the cream base.
Part of the appeal is also how forgiving the recipe is. Unlike a baked cheesecake, which can crack, sink, or overcook if you are not careful, this fluffy version is nearly impossible to mess up. As long as your cream cheese is softened and your whipped topping is properly folded in, you will end up with a smooth, stable mixture every time.
It also travels well. Whether you are bringing a dish to a family gathering, a backyard barbecue, or a school event, this dessert holds its shape in a cooler and does not require any last-minute assembly once you arrive. Scoop it into a serving bowl before you leave, or transport it in the mixing bowl and dish it out on-site.
Another reason this recipe has stuck around in so many family cookbooks is its budget-friendly nature. Every ingredient is easy to find at a regular grocery store, and none of them are particularly expensive. You do not need specialty baking items, imported chocolate, or hard-to-source fruit. A single batch can feed a decent-sized crowd, which makes it a practical choice when you are hosting or contributing to a shared meal without wanting to spend a lot of time or money.
The dessert also appeals to a wide range of tastes. It is sweet without being cloying, creamy without feeling overly rich, and the fruit component adds a bit of brightness that keeps each bite from feeling one-note. Kids tend to enjoy the sweetness and familiar cherry flavor, while adults often appreciate the tang from the cream cheese and lemon juice balancing things out. That broad appeal is part of why it shows up so often at gatherings where the guest list spans multiple generations.
Ingredients You Will Need
The ingredient list is short, and most of the items are pantry or refrigerator staples that many home cooks already have on hand.
- Cream cheese, softened to room temperature
- Sweetened condensed milk
- A tub of whipped topping, thawed
- Cherry pie filling
- A splash of vanilla extract
- A squeeze of fresh lemon juice, optional but recommended for balance
The lemon juice is a small addition that makes a noticeable difference. It cuts through the richness of the cream cheese and condensed milk, keeping the final result from tasting overly sweet or heavy.
Step-by-Step Preparation
Start by beating the softened cream cheese in a large mixing bowl until it is completely smooth with no lumps remaining. This step matters more than people expect. If the cream cheese is not fully softened, you will end up with small chunks throughout the finished dessert, and those do not smooth out once the other ingredients are added.
Next, pour in the sweetened condensed milk and continue beating until the mixture is fully combined and slightly lightened in color. Add the vanilla extract and lemon juice at this stage, mixing just until incorporated.
Once your base is smooth, gently fold in the whipped topping using a spatula rather than the mixer. Folding, rather than stirring vigorously, keeps the mixture light and airy instead of deflating the whipped topping. Work in batches if needed, adding a portion of the topping at a time until everything is evenly combined and no white streaks remain.
Finally, fold in most of the cherry pie filling, reserving a small amount to swirl on top or use as a garnish. Some people like to fully mix the cherries throughout for an even pink hue, while others prefer swirling them in for a marbled look with pockets of fruit in every bite. Either approach works well, so choose whichever presentation you like best.
Cover the bowl and refrigerate for at least one hour before serving. Chilling allows the flavors to meld and gives the fluff a firmer, more scoopable texture.
Serving Ideas and Presentation
This dessert is versatile enough to fit almost any occasion, and the way you serve it can completely change its feel.
For a casual family dessert, a large glass bowl works well, letting the pink and white swirls show through the sides. For a more formal gathering, spoon the mixture into individual dessert cups or mason jars, then top each one with a few whole cherries and a light dusting of graham cracker crumbs.
If you want to turn it into a layered trifle, alternate the fluff with crushed graham crackers or vanilla wafer crumbs in a tall glass dish. The crunch from the crumbs provides a nice contrast to the smooth, creamy filling and adds a texture that resembles a traditional cheesecake crust.
For a party setting, consider piping the mixture into small pastry cups or phyllo shells using a piping bag fitted with a star tip. This creates an elegant, bite-sized version that guests can pick up easily without needing a spoon or plate.
Storage and Make-Ahead Tips
One of the biggest advantages of this dessert is how well it holds up in the refrigerator. Stored in an airtight container, it stays fresh for three to five days, which makes it an excellent make-ahead option for busy weeks or planned events.
Because it contains dairy, it should always be kept cold and should not sit at room temperature for more than two hours. If you are transporting it to an outdoor event, keep it in a cooler with ice packs until you are ready to serve.
Freezing is possible, though the texture will change slightly after thawing. The whipped topping can lose some of its airiness once frozen and defrosted, so this method works best if you plan to eat the dessert within a month and do not mind a slightly denser texture after thawing.
Variations to Try
Once you have made the base recipe a few times, it becomes easy to experiment with different flavor combinations.
- Swap the cherry pie filling for blueberry, strawberry, or peach filling to change the flavor profile entirely.
- Add crushed graham crackers or shortbread cookies directly into the mixture for extra texture.
- Fold in a small amount of almond extract along with the vanilla for a flavor reminiscent of classic cherry desserts.
- Use light cream cheese and a sugar-free whipped topping for a lower-calorie version.
- Top with chocolate shavings or a drizzle of melted chocolate for a richer finish.
These small changes let you keep the same easy method while giving the dessert a slightly different personality each time you make it. You can also adjust the ratio of fruit to cream base depending on how tart or sweet you want the final result. Adding a little extra pie filling gives you a more pronounced fruit flavor in every bite, while cutting back slightly puts more emphasis on the creamy, cheesecake-like base. Once you understand how the ratios affect the outcome, it becomes easy to fine-tune the recipe to match your own preference or whatever you have available in the pantry.
Common Mistakes to Avoid
A few small missteps can affect the final texture, so it helps to know what to watch for.
Using cold cream cheese straight from the refrigerator is one of the most common issues. It will not blend smoothly and will leave lumps throughout the mixture. Set it out for at least 30 minutes before starting, or soften it briefly in the microwave in short bursts if you are short on time.
Overmixing after the whipped topping has been added is another common problem. Beating too vigorously at this stage knocks the air out of the topping, resulting in a denser, less fluffy final product. Always switch to gentle folding once the whipped topping goes in.
Skipping the chilling step is also worth avoiding. Serving the dessert immediately after mixing results in a softer, less structured texture. Giving it time in the refrigerator allows everything to set properly and makes for cleaner, more attractive servings.
Frequently Asked Questions
Can I make this dessert the night before? Yes, it actually tastes better after chilling overnight. The flavors have more time to blend, and the texture becomes firmer and easier to serve.
Can I use fresh cherries instead of pie filling? Fresh cherries can be used, but they lack the thickened syrup that gives the dessert its structure. If using fresh cherries, cook them down briefly with a bit of sugar and cornstarch to create a similar consistency before folding them in.
Is there a lighter version of this recipe? Yes, you can substitute light or reduced-fat cream cheese, low-fat sweetened condensed milk, and a light whipped topping without significantly changing the taste or texture.
How long does it last in the refrigerator? Properly stored in an airtight container, it stays fresh for three to five days. Always keep it chilled until serving.
Can I make this in individual portions ahead of a party? Absolutely. Portioning it into cups or jars the day before actually makes serving easier and keeps everything looking neat when guests arrive.
What can I use instead of whipped topping? Freshly whipped heavy cream with a bit of powdered sugar works as a substitute, though it will be slightly less stable and should be served the same day for best texture.
This simple, no-bake treat proves that a dessert does not need to be complicated to impress. With just a handful of ingredients and a short chilling time, you get a creamy, fruity bowl that works for casual weeknights and special gatherings alike. Once you have the base method down, cherry cheesecake fluff becomes one of those recipes you keep coming back to, tweaking the fruit or toppings depending on the season and whatever you are in the mood for. Keep the ingredient list on hand, and you will always have a dependable dessert ready to go with almost no notice.