
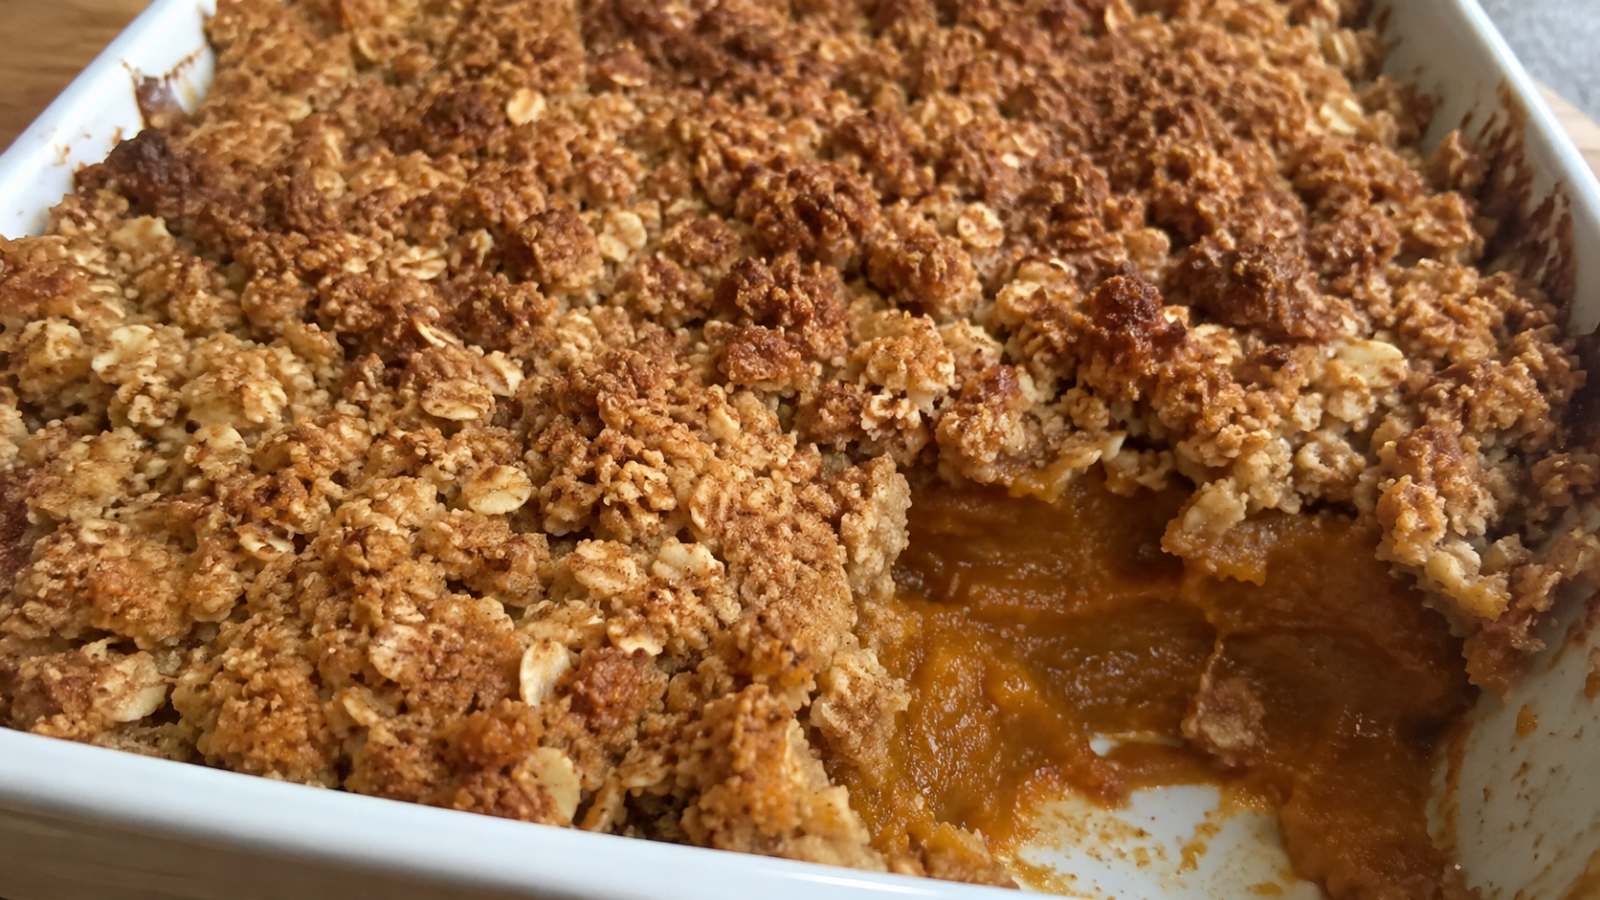
There is something deeply comforting about a warm pan of pumpkin dessert coming out of the oven on a cool autumn evening. The spiced aroma drifts through the kitchen, the topping turns golden and crunchy, and everyone suddenly finds a reason to hover near the stove. If you have been searching for The Best Pumpkin Crisp Recipe, you are in the right place. This version brings together a creamy, spiced pumpkin base and a buttery oat topping that bakes into crisp, caramelized clusters. It uses pantry staples, comes together in about 15 minutes of prep, and feeds a crowd without any fuss.
Pumpkin crisp sits happily between a pie and a cobbler. You get all the flavor of pumpkin pie filling, but without the stress of rolling out a crust or worrying about cracks. The oat topping adds texture, warmth, and a little chew.
Key Takeaways
- Pumpkin crisp combines a smooth, spiced pumpkin layer with a crunchy brown sugar oat topping, no pie crust required.
- Prep takes about 15 minutes, and the dessert bakes in roughly 45 to 55 minutes.
- Canned pumpkin puree works perfectly, so there is no need to roast fresh pumpkin.
- The crisp can be made ahead, stored, and reheated, which makes it ideal for gatherings.
- Serve it warm with vanilla ice cream or whipped cream for the full cozy effect.
Why You Will Love This Pumpkin Crisp
Some desserts demand precision, special equipment, or a long list of ingredients. This one does not. Here is why it earns a permanent spot in the fall baking rotation.
It is forgiving. Pumpkin pie can crack, weep, or underbake. A crisp is far more relaxed. If your topping is a little uneven or your baking time runs a few minutes long, the dessert still tastes wonderful.
It uses simple ingredients. Canned pumpkin, eggs, evaporated milk, sugar, spices, flour, oats, and butter are all you need. Most kitchens already have almost everything on hand.
It offers contrast in every bite. The base is silky and custardy, while the topping is crunchy and buttery. That play between soft and crisp is what makes people go back for a second scoop.
It scales easily. You can double the recipe for a larger pan or halve it for a small family dinner, and the results stay consistent.
Ingredients You Will Need
For the Pumpkin Layer
- 1 can (15 ounces) pumpkin puree, not pumpkin pie filling
- 1 can (12 ounces) evaporated milk
- 3 large eggs
- 3/4 cup granulated sugar
- 1/4 cup brown sugar, packed
- 2 teaspoons ground cinnamon
- 1 teaspoon pumpkin pie spice
- 1/2 teaspoon ground ginger
- 1/4 teaspoon ground nutmeg
- 1/2 teaspoon salt
- 2 teaspoons vanilla extract
For the Crisp Topping
- 1 cup all-purpose flour
- 1 cup old-fashioned rolled oats
- 3/4 cup brown sugar, packed
- 1/2 teaspoon ground cinnamon
- 1/4 teaspoon salt
- 3/4 cup (1 1/2 sticks) cold unsalted butter, cut into small cubes
- 1/2 cup chopped pecans or walnuts (optional)
A quick note on the pumpkin: always check the label. Pumpkin puree is simply cooked, mashed pumpkin. Pumpkin pie filling already contains sugar and spices, which will throw off the balance of this recipe.
Step-by-Step Instructions
Step 1: Prepare Your Oven and Pan
Preheat your oven to 350 degrees Fahrenheit. Lightly grease a 9 by 13 inch baking dish with butter or nonstick spray. A glass or ceramic dish works especially well because it heats evenly and lets you check the color of the edges as it bakes.
Step 2: Mix the Pumpkin Layer
In a large bowl, whisk the eggs until they are smooth and slightly frothy. Add the pumpkin puree, evaporated milk, granulated sugar, brown sugar, vanilla, cinnamon, pumpkin pie spice, ginger, nutmeg, and salt. Whisk everything together until the mixture is completely smooth with no streaks of egg or pockets of spice.
Pour the mixture into your prepared dish and spread it into an even layer.
Step 3: Make the Crunchy Topping
In a separate bowl, stir together the flour, oats, brown sugar, cinnamon, and salt. Add the cold butter cubes. Using a pastry cutter, a fork, or your fingertips, work the butter into the dry ingredients until the mixture looks like coarse, chunky crumbs. You want some pea-sized pieces of butter remaining, because those melt in the oven and create pockets of crispness.
If you are using nuts, fold them in now.
Step 4: Assemble and Bake
Sprinkle the topping evenly over the pumpkin layer, covering it all the way to the edges. Press down very lightly, just enough so the crumbs settle in place. Do not pack it down firmly, or the topping can turn dense rather than crisp.
Bake for 45 to 55 minutes. The crisp is ready when the topping is deep golden brown, the edges are bubbling gently, and the center is set with only a very slight jiggle. A knife inserted near the middle should come out mostly clean.
Step 5: Cool Before Serving
Let the pumpkin crisp rest on a wire rack for at least 20 to 30 minutes. This resting time allows the custardy base to firm up so you can scoop clean portions. Serve warm, topped with a generous spoonful of whipped cream or a scoop of vanilla ice cream.
Tips for the Crispiest Topping
A crisp should be crisp, so the topping deserves some attention. These small habits make a noticeable difference.
Keep the butter cold. Cold butter creates a crumbly, textured topping. Warm or melted butter turns the mixture into a paste that bakes up soft and cakey.
Use old-fashioned oats. Rolled oats hold their shape and give the topping a hearty bite. Quick oats can turn mushy, and steel-cut oats stay too hard.
Do not skip the salt. A little salt in the topping balances the sweetness of the brown sugar and makes the butter taste richer.
Add nuts for extra crunch. Pecans pair beautifully with pumpkin, and toasting them in a dry skillet for a few minutes beforehand deepens their flavor.
Bake on the middle rack. This helps the topping brown evenly without scorching before the center sets.
Easy Variations to Try
Once you have mastered the base recipe, there are plenty of ways to make it your own.
Apple pumpkin crisp. Layer thinly sliced, peeled apples over the pumpkin mixture before adding the topping. The tart fruit adds a lovely contrast to the creamy base.
Gingersnap topping. Replace half of the flour and oats with crushed gingersnap cookies for a spicier, snappier crunch.
Maple pecan crisp. Swap the granulated sugar in the pumpkin layer for pure maple syrup, reducing the evaporated milk by two tablespoons. Add extra pecans to the topping for a nutty finish.
Gluten-free version. Use a one-to-one gluten-free flour blend and certified gluten-free oats. The texture stays remarkably close to the original.
Dairy-free option. Substitute full-fat canned coconut milk for the evaporated milk and use vegan butter in the topping. The coconut adds a subtle richness that works well with the spices.
Make-Ahead, Storage, and Reheating
One of the biggest perks of this dessert is how well it handles planning ahead.
Make ahead: You can assemble the pumpkin layer and the topping separately up to one day in advance. Cover the pumpkin mixture and refrigerate it, and keep the topping in an airtight container in the refrigerator. When you are ready, combine and bake, adding about five extra minutes if the base is very cold.
Storing leftovers: Cover the cooled crisp tightly and refrigerate for up to four days. Because the base contains eggs and milk, it should not sit at room temperature for more than two hours.
Reheating: Warm individual portions in a 325 degree oven for about 10 minutes to revive the crunch. The microwave works in a pinch, but the topping will soften.
Freezing: Freeze the baked and fully cooled crisp, wrapped well, for up to two months. Thaw overnight in the refrigerator, then reheat in the oven.
What to Serve With Pumpkin Crisp
The right accompaniment turns a good dessert into a memorable one. Classic vanilla bean ice cream is the crowd favorite, since the cold, creamy scoop melts into the warm spiced base. Freshly whipped cream with a pinch of cinnamon is a lighter option. For something more indulgent, drizzle warm caramel sauce over the top or add a dollop of lightly sweetened mascarpone.
Beverage pairings matter too. A hot cup of coffee, a spiced chai, or a mug of apple cider all complement the warm flavors beautifully. If you are serving the dessert after a big holiday meal, a small portion with a cup of tea feels just right.
Common Mistakes to Avoid
Even simple recipes have a few traps. Watch out for these.
Using pumpkin pie filling instead of puree. This is the most common error, and it leads to a dessert that is overly sweet and oddly spiced.
Overbaking. Pulling the crisp from the oven when the center still has a tiny wobble is ideal. It continues to set as it cools. Baking until completely firm can make the base rubbery.
Overmixing the topping. Work the butter in just until coarse crumbs form. Mixing too long warms the butter and creates a dense, doughy texture.
Cutting too soon. Slicing into the crisp straight from the oven will give you a loose, runny scoop. Patience pays off.
Skimping on the spices. Pumpkin is naturally mild, so the spices do the heavy lifting. Make sure your ground spices are fresh, ideally less than a year old, for the best aroma and taste.
Nutrition Notes
A typical serving, based on twelve portions per pan, contains roughly 340 calories, 15 grams of fat, 48 grams of carbohydrates, and 5 grams of protein. Pumpkin itself is rich in beta carotene and fiber, which adds a small nutritional boost to an otherwise indulgent treat. These numbers are estimates and will vary depending on the exact ingredients and portion sizes you use.
Frequently Asked Questions
Can I use fresh pumpkin instead of canned puree?
Yes, you can. Roast a sugar pumpkin until tender, scoop out the flesh, and puree it until smooth. Fresh pumpkin tends to hold more water, so strain it through a fine mesh sieve or press it between paper towels before measuring.
Can I make pumpkin crisp without evaporated milk?
You can substitute heavy cream or full-fat coconut milk in equal amounts. Regular milk works too, but the base will be slightly less rich and may set a little softer.
How do I know when the crisp is done baking?
Look for a golden brown topping, gently bubbling edges, and a center that is mostly set. A knife inserted near the middle should come out with just a bit of moist custard clinging to it.
Is pumpkin crisp the same as pumpkin cobbler?
They are close relatives but not identical. A crisp has a streusel-style topping made with oats, butter, and sugar, while a cobbler usually features a biscuit or batter topping. Crisp offers more crunch.
Can I prepare this dessert in a smaller pan?
Absolutely. Halve all the ingredients and bake in an 8 inch square dish for about 40 to 45 minutes. Keep an eye on the topping so it does not brown too quickly.
What is the best way to keep the topping crunchy?
Use cold butter, avoid packing the crumbs down, and serve the crisp the day it is baked. If you are storing leftovers, reheat portions in the oven rather than the microwave to restore the texture.
A warm pan of spiced pumpkin topped with golden, buttery oats is hard to beat in any season, but it truly shines when the weather turns cool. With simple ingredients, easy steps, and plenty of room for variations, this dessert fits into busy weeknights and special occasions alike. Bake it once and it is likely to become a tradition. Whenever you want The Best Pumpkin Crisp Recipe for your fall table, come back to this one, scoop it warm, add your favorite topping, and enjoy every cozy bite.