
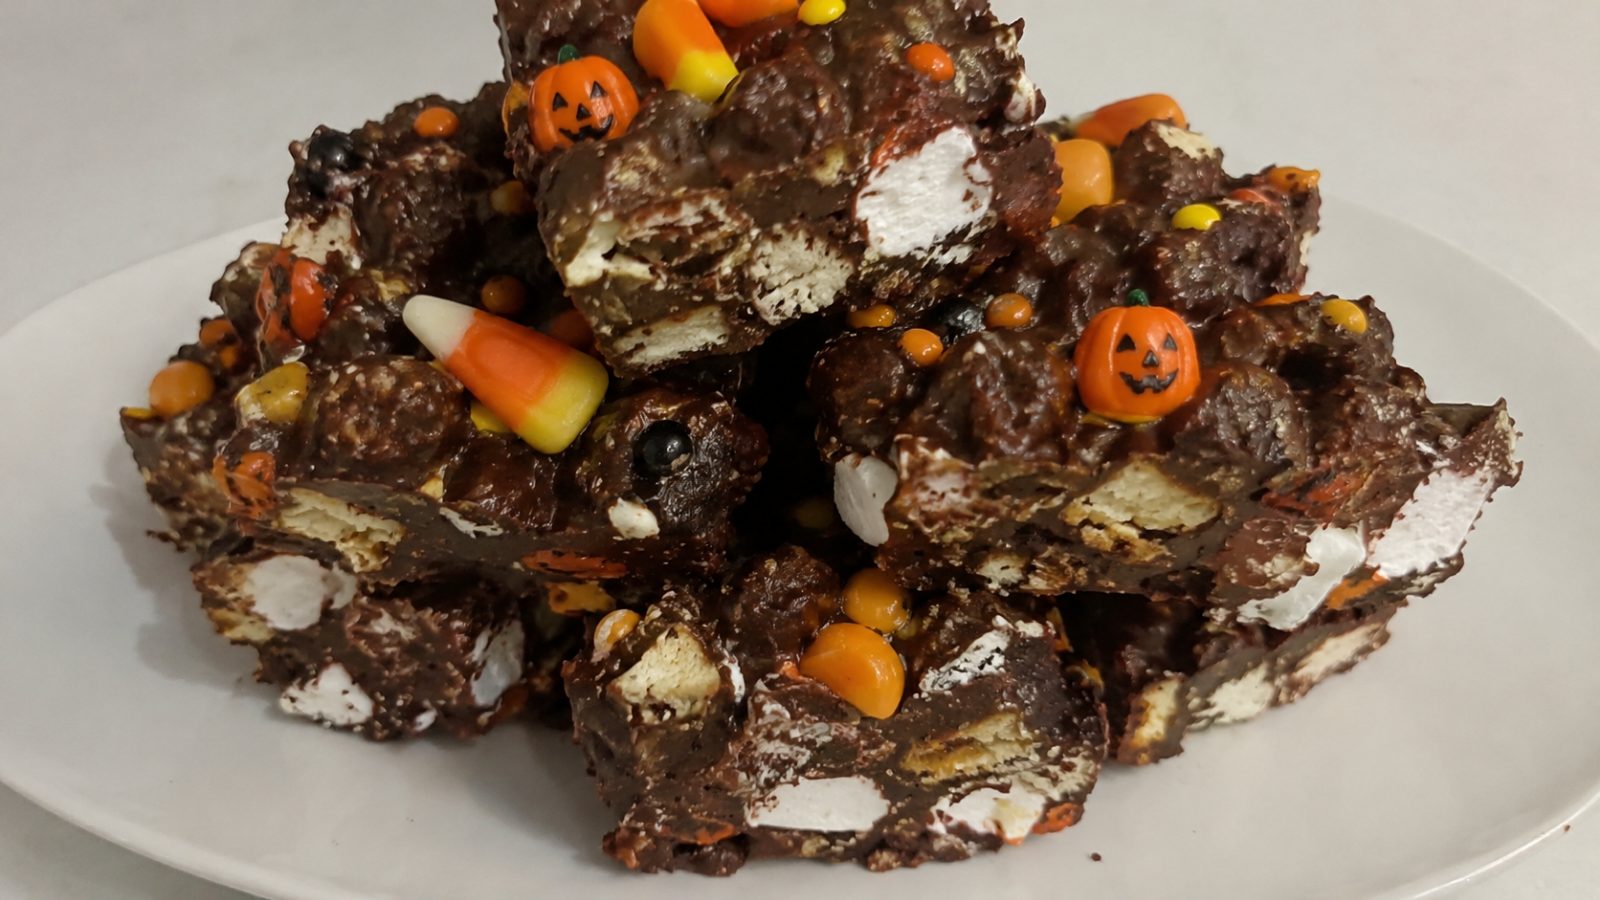
Every October, the same question comes up: what can you make that looks impressive, tastes incredible, and does not require an oven or hours of kitchen stress? The answer is Halloween Rocky Road, a chocolate-packed, marshmallow-studded candy bark that you can customize with orange, purple, and black touches. It takes about 20 minutes of active work, it feeds a crowd, and it looks like you spent far more time on it than you did. This guide covers ingredients, step-by-step instructions, creative variations, storage advice, and troubleshooting so your batch turns out perfect.
Key Takeaways
- This no-bake treat needs only about 20 minutes of hands-on time plus chilling, making it ideal for busy October schedules.
- Good chocolate, fresh marshmallows, and a crunchy mix-in are the three pillars of a great batch.
- Themed candy, sprinkles, and drizzles turn a classic dessert into a festive centerpiece for parties and school events.
- Properly stored, the candy stays fresh for up to two weeks, so you can make it ahead.
- Easy swaps make it friendly for nut allergies, vegan diets, and picky eaters.
Why This Treat Works So Well in October
Rocky road has always been a crowd favorite. The combination of creamy chocolate, soft marshmallows, and crunchy nuts hits every texture note at once. When you dress it up for the spooky season, it becomes even more fun. Candy eyeballs, pumpkin-shaped sprinkles, crushed cookies, and colorful melting wafers transform a simple pan of chocolate into something that looks like it belongs on a party buffet.
There is also the practical side. Autumn is a busy time. Between school parties, neighborhood gatherings, trick-or-treating, and movie nights, you need recipes that are forgiving and fast. This one is almost impossible to ruin. There is no baking time to monitor, no delicate technique, and no special equipment. If you can melt chocolate and stir, you can make a showstopping tray of candy.
It is also a great recipe to make with kids. Little hands can sort candies, fold in marshmallows, and sprinkle toppings. The mess is minimal, the results are delicious, and everyone gets to feel proud of what ends up on the plate.
Ingredients You Will Need
The basic formula is simple. Here is a reliable base that makes about 24 squares in a 9×13 inch pan:
- 16 ounces (about 450 grams) semisweet or milk chocolate chips
- 1 can (14 ounces) sweetened condensed milk, optional for a fudgier base
- 2 tablespoons butter or coconut oil
- 3 cups mini marshmallows
- 1 cup roasted almonds, pecans, or walnuts, roughly chopped
- 1 cup crushed chocolate sandwich cookies or pretzel pieces
- 1/2 cup candy corn or chopped chocolate candies
- 1/4 cup candy eyeballs
- 1/2 cup orange and purple melting wafers for drizzling
- Halloween sprinkles for decoration
- A pinch of flaky sea salt
You do not need to use every item on this list. Think of it as a menu to choose from. The essential trio is chocolate, marshmallows, and something crunchy. Everything else is decoration and personality.
Choosing the Right Chocolate
The chocolate makes up most of the finished candy, so quality matters. Semisweet chips give a balanced flavor that stands up against sugary marshmallows and candy toppings. Milk chocolate is sweeter and more kid-friendly. Dark chocolate gives a more grown-up result and pairs nicely with salty nuts.
Chips are convenient because they hold their shape and melt evenly with gentle heat. If you prefer to chop a chocolate bar, choose one with a cocoa butter base rather than a cheap coating, which can turn greasy. For a glossy finish and a clean snap, the addition of a tablespoon of butter or coconut oil helps the melted chocolate stay smooth and spreadable.
A mix works beautifully too. Try two parts semisweet to one part milk chocolate for a rich but approachable flavor.
Equipment Checklist
Keep your setup simple:
- A 9×13 inch baking pan, or a rimmed baking sheet for a thinner bark style
- Parchment paper or foil for easy removal
- A microwave-safe bowl or a double boiler
- A rubber spatula
- A sharp knife for cutting clean squares
- Small zip-top bags or piping bags for drizzling
Line the pan with parchment, leaving a little overhang on the sides. This creates handles so you can lift the whole slab out for slicing. Lightly greasing the parchment is optional but helpful if you plan to add sticky candies.
Step-by-Step Instructions
Step 1: Prep your toppings. Before you melt anything, measure and set out all your mix-ins. Chocolate begins to set quickly, so having everything ready prevents rushing. Chop the nuts, crush the cookies, and open the candy bags.
Step 2: Melt the chocolate. Place the chocolate chips and butter in a microwave-safe bowl. Heat in 30-second bursts, stirring thoroughly between each one. Stop when the chips are about 80 percent melted and stir until the residual heat finishes the job. This prevents scorching and keeps the chocolate glossy. If you use a double boiler, keep the water at a gentle simmer and never let any steam or water touch the chocolate.
Step 3: Add the condensed milk if using. For a softer, fudgier texture, stir in the sweetened condensed milk until the mixture is smooth. Skip this step if you want a firmer, more classic candy bark.
Step 4: Let it cool slightly. Allow the chocolate to rest for two to three minutes. Marshmallows added to piping hot chocolate will melt and disappear into the mixture, which makes the texture gooey rather than chunky.
Step 5: Fold in the mix-ins. Add the marshmallows, nuts, cookie pieces, and half of the candy corn. Fold gently until everything is coated but still visible. Work quickly and avoid overmixing.
Step 6: Spread into the pan. Scrape the mixture into the prepared pan and press it into an even layer with your spatula. Use slightly damp fingertips or a piece of parchment to press the top flat without sticking.
Step 7: Decorate. While the surface is still soft, scatter the candy eyeballs, remaining candy corn, and sprinkles over the top. Press them lightly so they stick.
Step 8: Drizzle. Melt the orange and purple wafers separately, according to package directions. Transfer each color to a small bag, snip a tiny corner, and zigzag across the surface. A fork dipped in melted wafers also works for a looser, spiderweb effect.
Step 9: Chill. Refrigerate for at least two hours, or until fully set. Lift out the slab using the parchment handles, let it sit for five minutes to take the chill off, and slice into squares with a sharp knife.
Creative Variations to Try
One reason this recipe is so popular is how easy it is to adapt. Here are some ideas to match your theme and guest list.
Monster Mash Version. Use green melting wafers as a base, add crushed sandwich cookies, and decorate with large candy eyes. Each square looks like a tiny monster face.
Graveyard Style. Press crushed chocolate cookies across the top to resemble dirt, then add small cookie “tombstones” and gummy worms peeking out of the surface.
Pumpkin Patch. Use orange candy melts for the drizzle, then top with candy pumpkins and chopped pretzels for a salty crunch.
Witch’s Brew. Combine dark chocolate with purple and green sprinkles, then add a layer of crushed peanut butter cups for a rich, nutty center.
Spiderweb Squares. Melt white chocolate and pipe concentric circles onto the dark chocolate surface. Drag a toothpick from the center outward to create a perfect web pattern.
Peanut Butter Lover. Swirl a few spoonfuls of creamy peanut butter into the melted chocolate, then add chopped peanuts and miniature peanut butter cups.
Dietary Swaps and Allergy Notes
Making this treat inclusive is simple with a few adjustments.
For a nut-free version, replace the nuts with crushed pretzels, toasted pumpkin seeds, or crispy rice cereal. Always check candy labels, as many decorations are produced in facilities that also handle nuts. If you are baking for a classroom, confirm the school policy before you start.
For a vegan version, choose dairy-free chocolate chips, use coconut oil instead of butter, and look for vegan marshmallows made without gelatin. Coconut condensed milk can replace the sweetened condensed milk.
For a gluten-free batch, use gluten-free cookies or skip the cookie pieces altogether. Most chocolate chips and marshmallows are naturally gluten-free, but it is smart to read packaging closely.
For lower sugar, choose dark chocolate with a higher cocoa percentage and cut back on the candy toppings. A sprinkle of sea salt balances the sweetness nicely.
Tips for the Best Texture and Flavor
Small details separate an average tray from a spectacular one.
Use fresh marshmallows. Stale marshmallows turn hard and chewy. A fresh bag stays soft inside the chocolate.
Toast your nuts. Five to eight minutes in a 350 degree oven brings out a deeper flavor and a better crunch. Let them cool completely before adding.
Keep water away. Even a drop of water can cause chocolate to seize into a grainy clump. Dry your bowls and spatulas thoroughly.
Do not overheat. Chocolate burns easily. Low and slow is always the better approach.
Add salt. A light sprinkle of flaky sea salt on top sharpens the chocolate flavor and keeps the sweetness from feeling flat.
Cut with a warm knife. Dip the blade in hot water and wipe it dry between cuts. The warmth glides through the chocolate for cleaner edges.
Press toppings gently. If decorations sit on top without sinking in slightly, they can fall off after the chocolate sets.
Common Mistakes and How to Fix Them
The chocolate is grainy or stiff. This usually means it seized from moisture or overheating. Stir in a teaspoon of warm oil or cream to loosen it. It may not be perfect, but it will still taste good when mixed with other ingredients.
The marshmallows melted. The chocolate was too hot when you added them. Next time, let it cool for a few minutes first. For now, chill the batch a bit longer and serve it as a softer fudge-style candy.
The squares will not hold together. There may be too many mix-ins for the amount of chocolate. Press the mixture firmly into the pan and add a little extra melted chocolate over the top to bind it.
The surface looks dull. Chocolate that cools too slowly or unevenly can lose its shine. Chill it promptly in the refrigerator, and avoid moving it between hot and cold places.
The decorations slide off. Add them while the surface is still tacky, and press them in slightly. For stubborn candies, use a dab of melted chocolate as glue.
Serving and Presentation Ideas
Presentation is half the fun at a spooky gathering. Stack squares on a black platter with fake cobwebs and plastic spiders around the edge. Use a tiered cake stand lined with parchment and tuck in a few mini pumpkins. Wrap individual pieces in clear cellophane bags tied with orange and black ribbon to create take-home favors.
For a dessert table, label each tray with a playful name card, such as “Monster Munch” or “Ghoul Gold.” If you offer several flavor variations, include small cards listing the main ingredients so guests with allergies can choose safely.
A cut-out look also works well. Press the set slab with Halloween cookie cutters, such as bats, ghosts, or pumpkins, for novelty shapes. The scraps can be crumbled over ice cream for a bonus dessert.
Storing and Making Ahead
One of the best things about this candy is how well it keeps. Store the squares in an airtight container with parchment between layers. At cool room temperature, they stay fresh for three to four days. In the refrigerator, they last up to two weeks. Bring them out for a few minutes before serving so the chocolate softens slightly and the flavors come through.
For longer storage, freeze the squares in a single layer until firm, then transfer them to a freezer bag. They keep well for up to three months. Thaw in the refrigerator overnight to prevent condensation from marring the surface.
If you are planning a party, make the base a day or two ahead and add the drizzle and decorations on the morning of the event. This keeps colors vivid and sprinkles bright.
Gifting and Party Planning
A batch of this candy makes a thoughtful gift for teachers, neighbors, and coworkers. Pack a few squares in a small box lined with tissue paper, add a handwritten tag, and you have a homemade present that feels personal. Trick-or-treaters would also be delighted to find a wrapped square among the usual store-bought candy, though be mindful of allergies and local guidelines about homemade treats.
For parties, set up a decorating station. Pour melted chocolate and marshmallows into a pan, then let guests pick their own toppings from small bowls of candy, cookies, and sprinkles. Kids love customizing their own square, and adults enjoy the creativity as well. It turns dessert into an activity and takes pressure off the host.
Frequently Asked Questions
Can I make this recipe without nuts?
Yes. Replace the nuts with crushed pretzels, crispy rice cereal, or toasted seeds for crunch. Always check candy labels for allergen warnings if you are serving guests with severe allergies.
How long does it take to set?
Most batches set firmly in about two hours in the refrigerator. If you used condensed milk for a fudgier texture, allow an extra 30 to 60 minutes for the best slicing results.
Can I use white chocolate instead?
Absolutely. White chocolate is sweeter and creates a bright canvas for colorful decorations. Pair it with dark chocolate drizzle for contrast, and use a good quality brand since cheaper versions can taste waxy.
What is the best way to cut clean squares?
Let the slab sit at room temperature for about five minutes, then use a long, sharp knife dipped in hot water and wiped dry. Press straight down rather than sawing for neat edges.
Can I make it ahead of time for a party?
Yes. The squares keep for up to two weeks in the refrigerator and up to three months in the freezer. Add the final sprinkles just before serving for the freshest look.